Appearance
ASCII to concept video
You don't need CAD or sketching skills to world-build. Just describe your ideas, and let a chatbot map out the layout in text. It's a fast, low cost way to tweak rooms and paths until they feel right. Once you love the plan, screenshot it to generate your final images and video.
Below, we demonstrate the process with a fantasy witch house: from text plan, to image, to render, to short film.
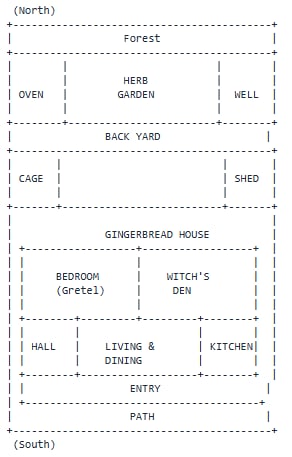

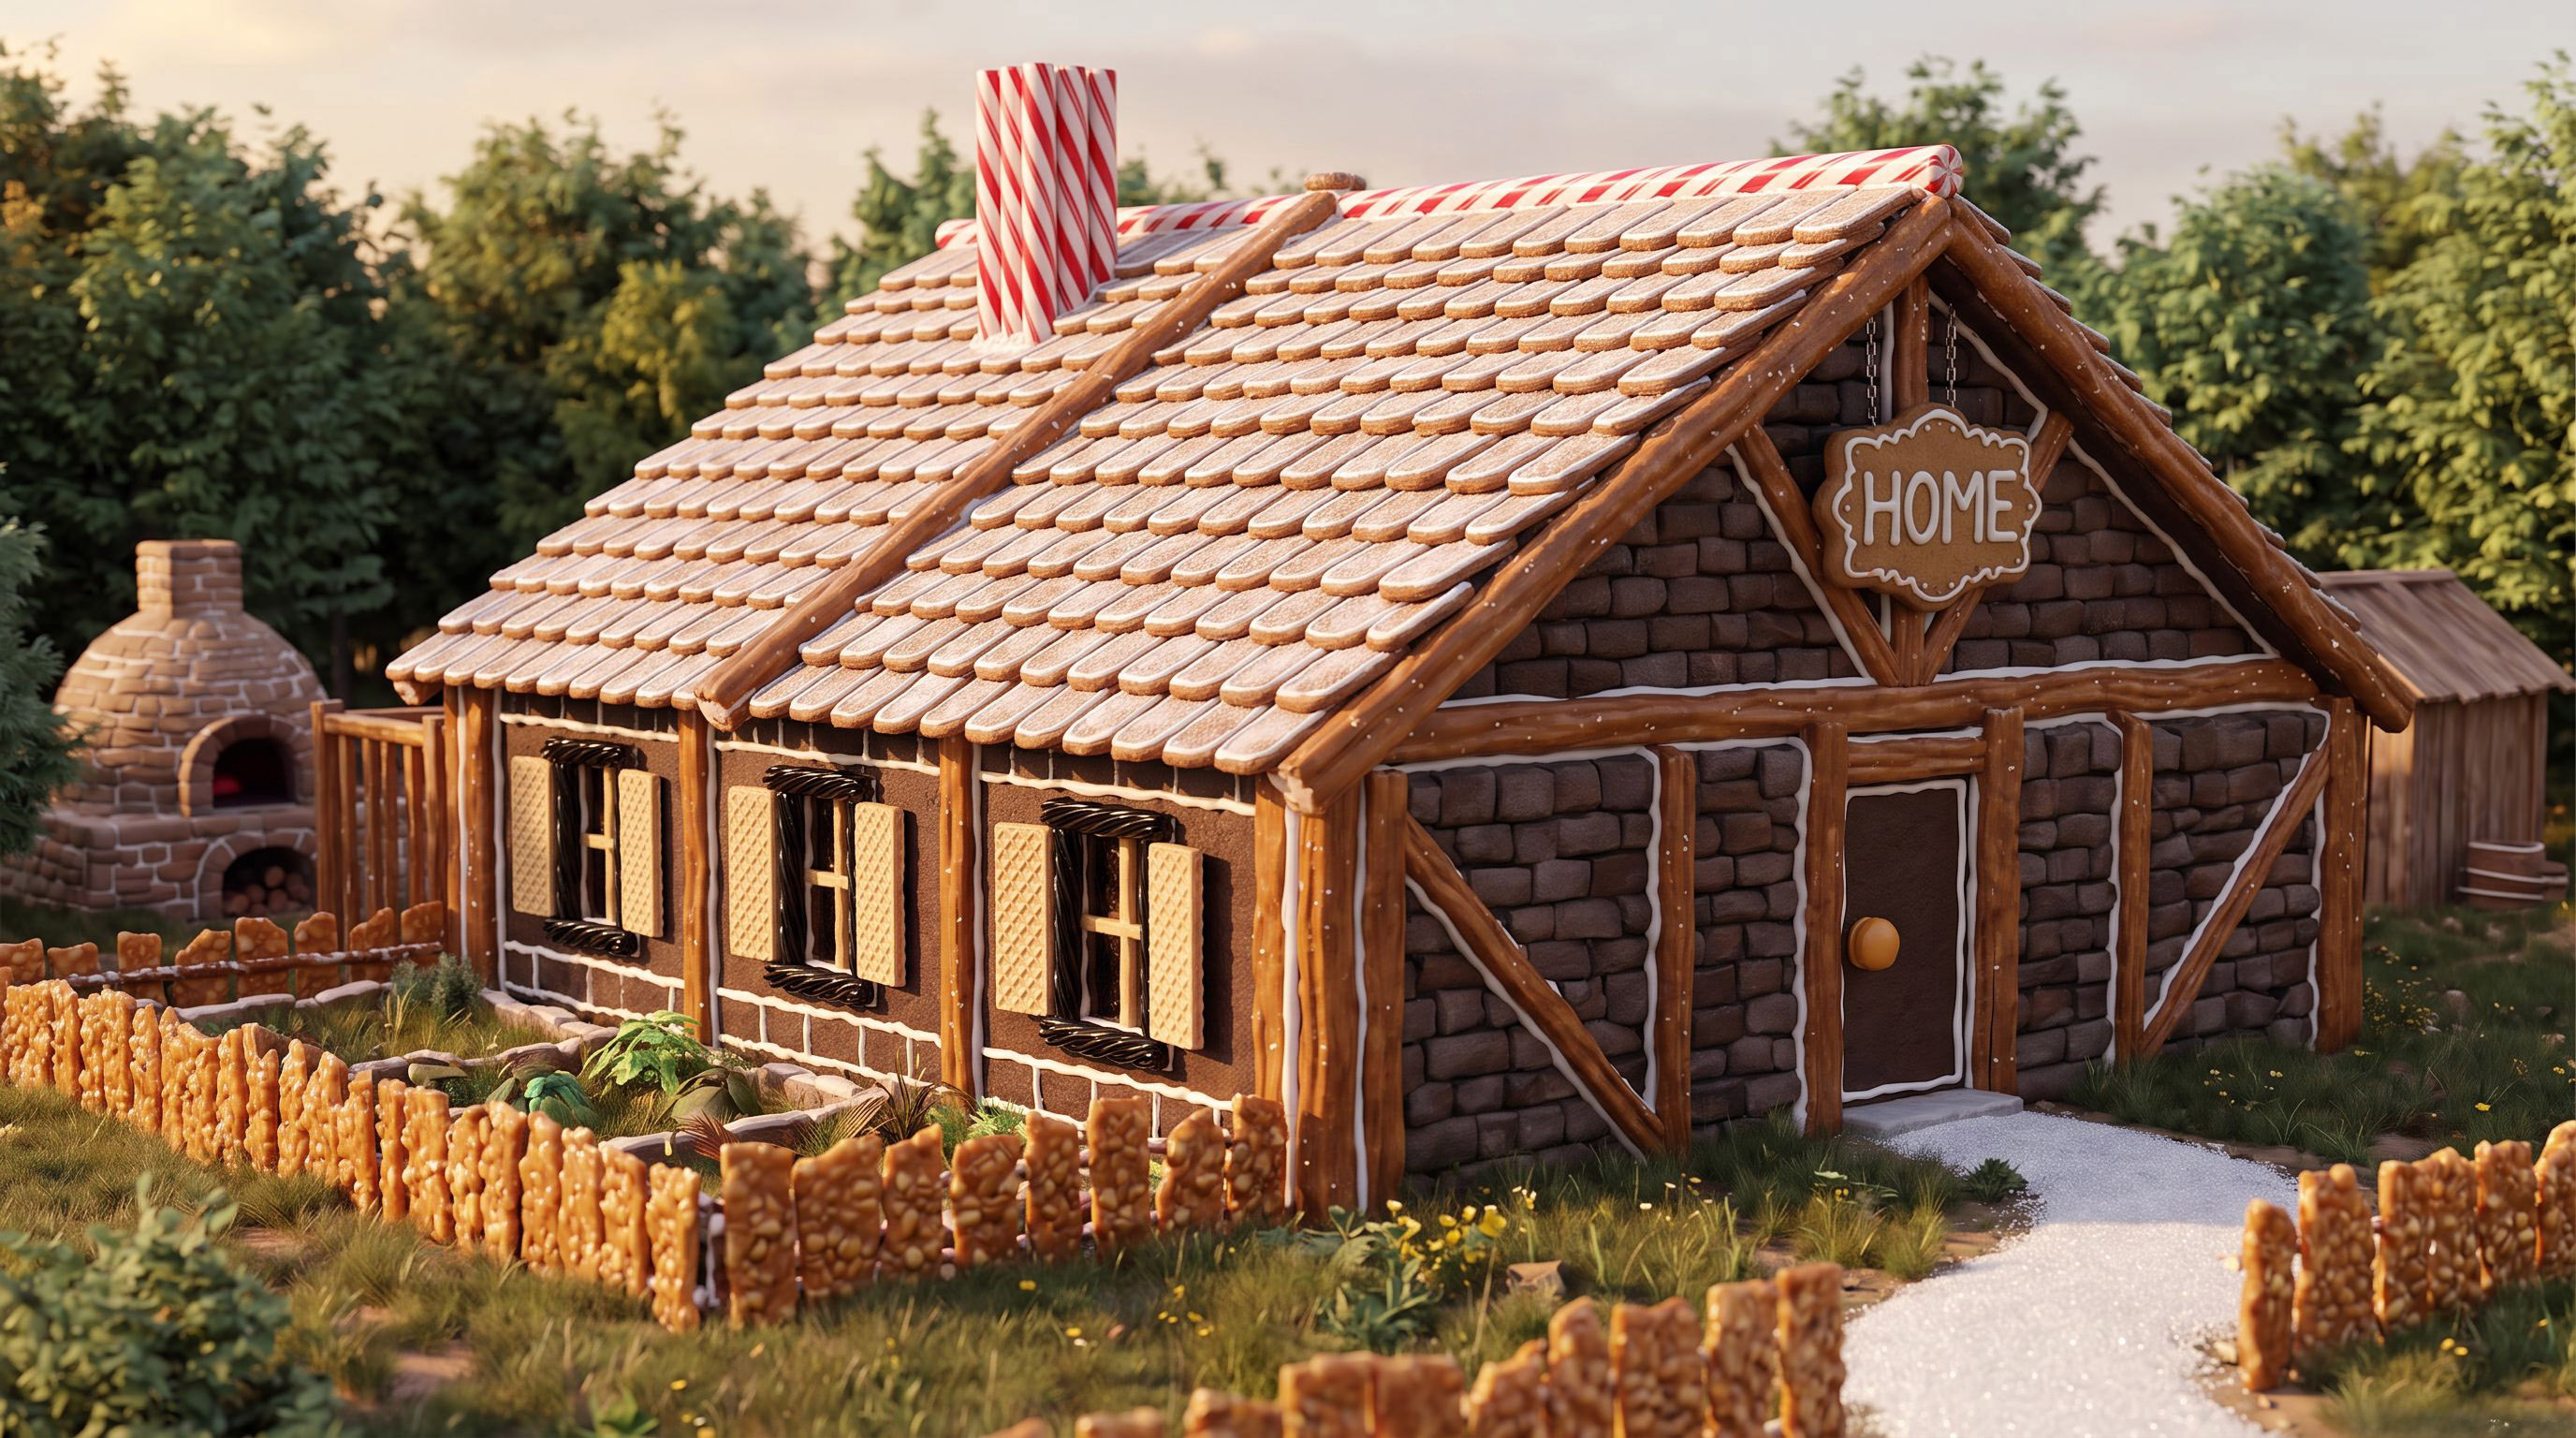
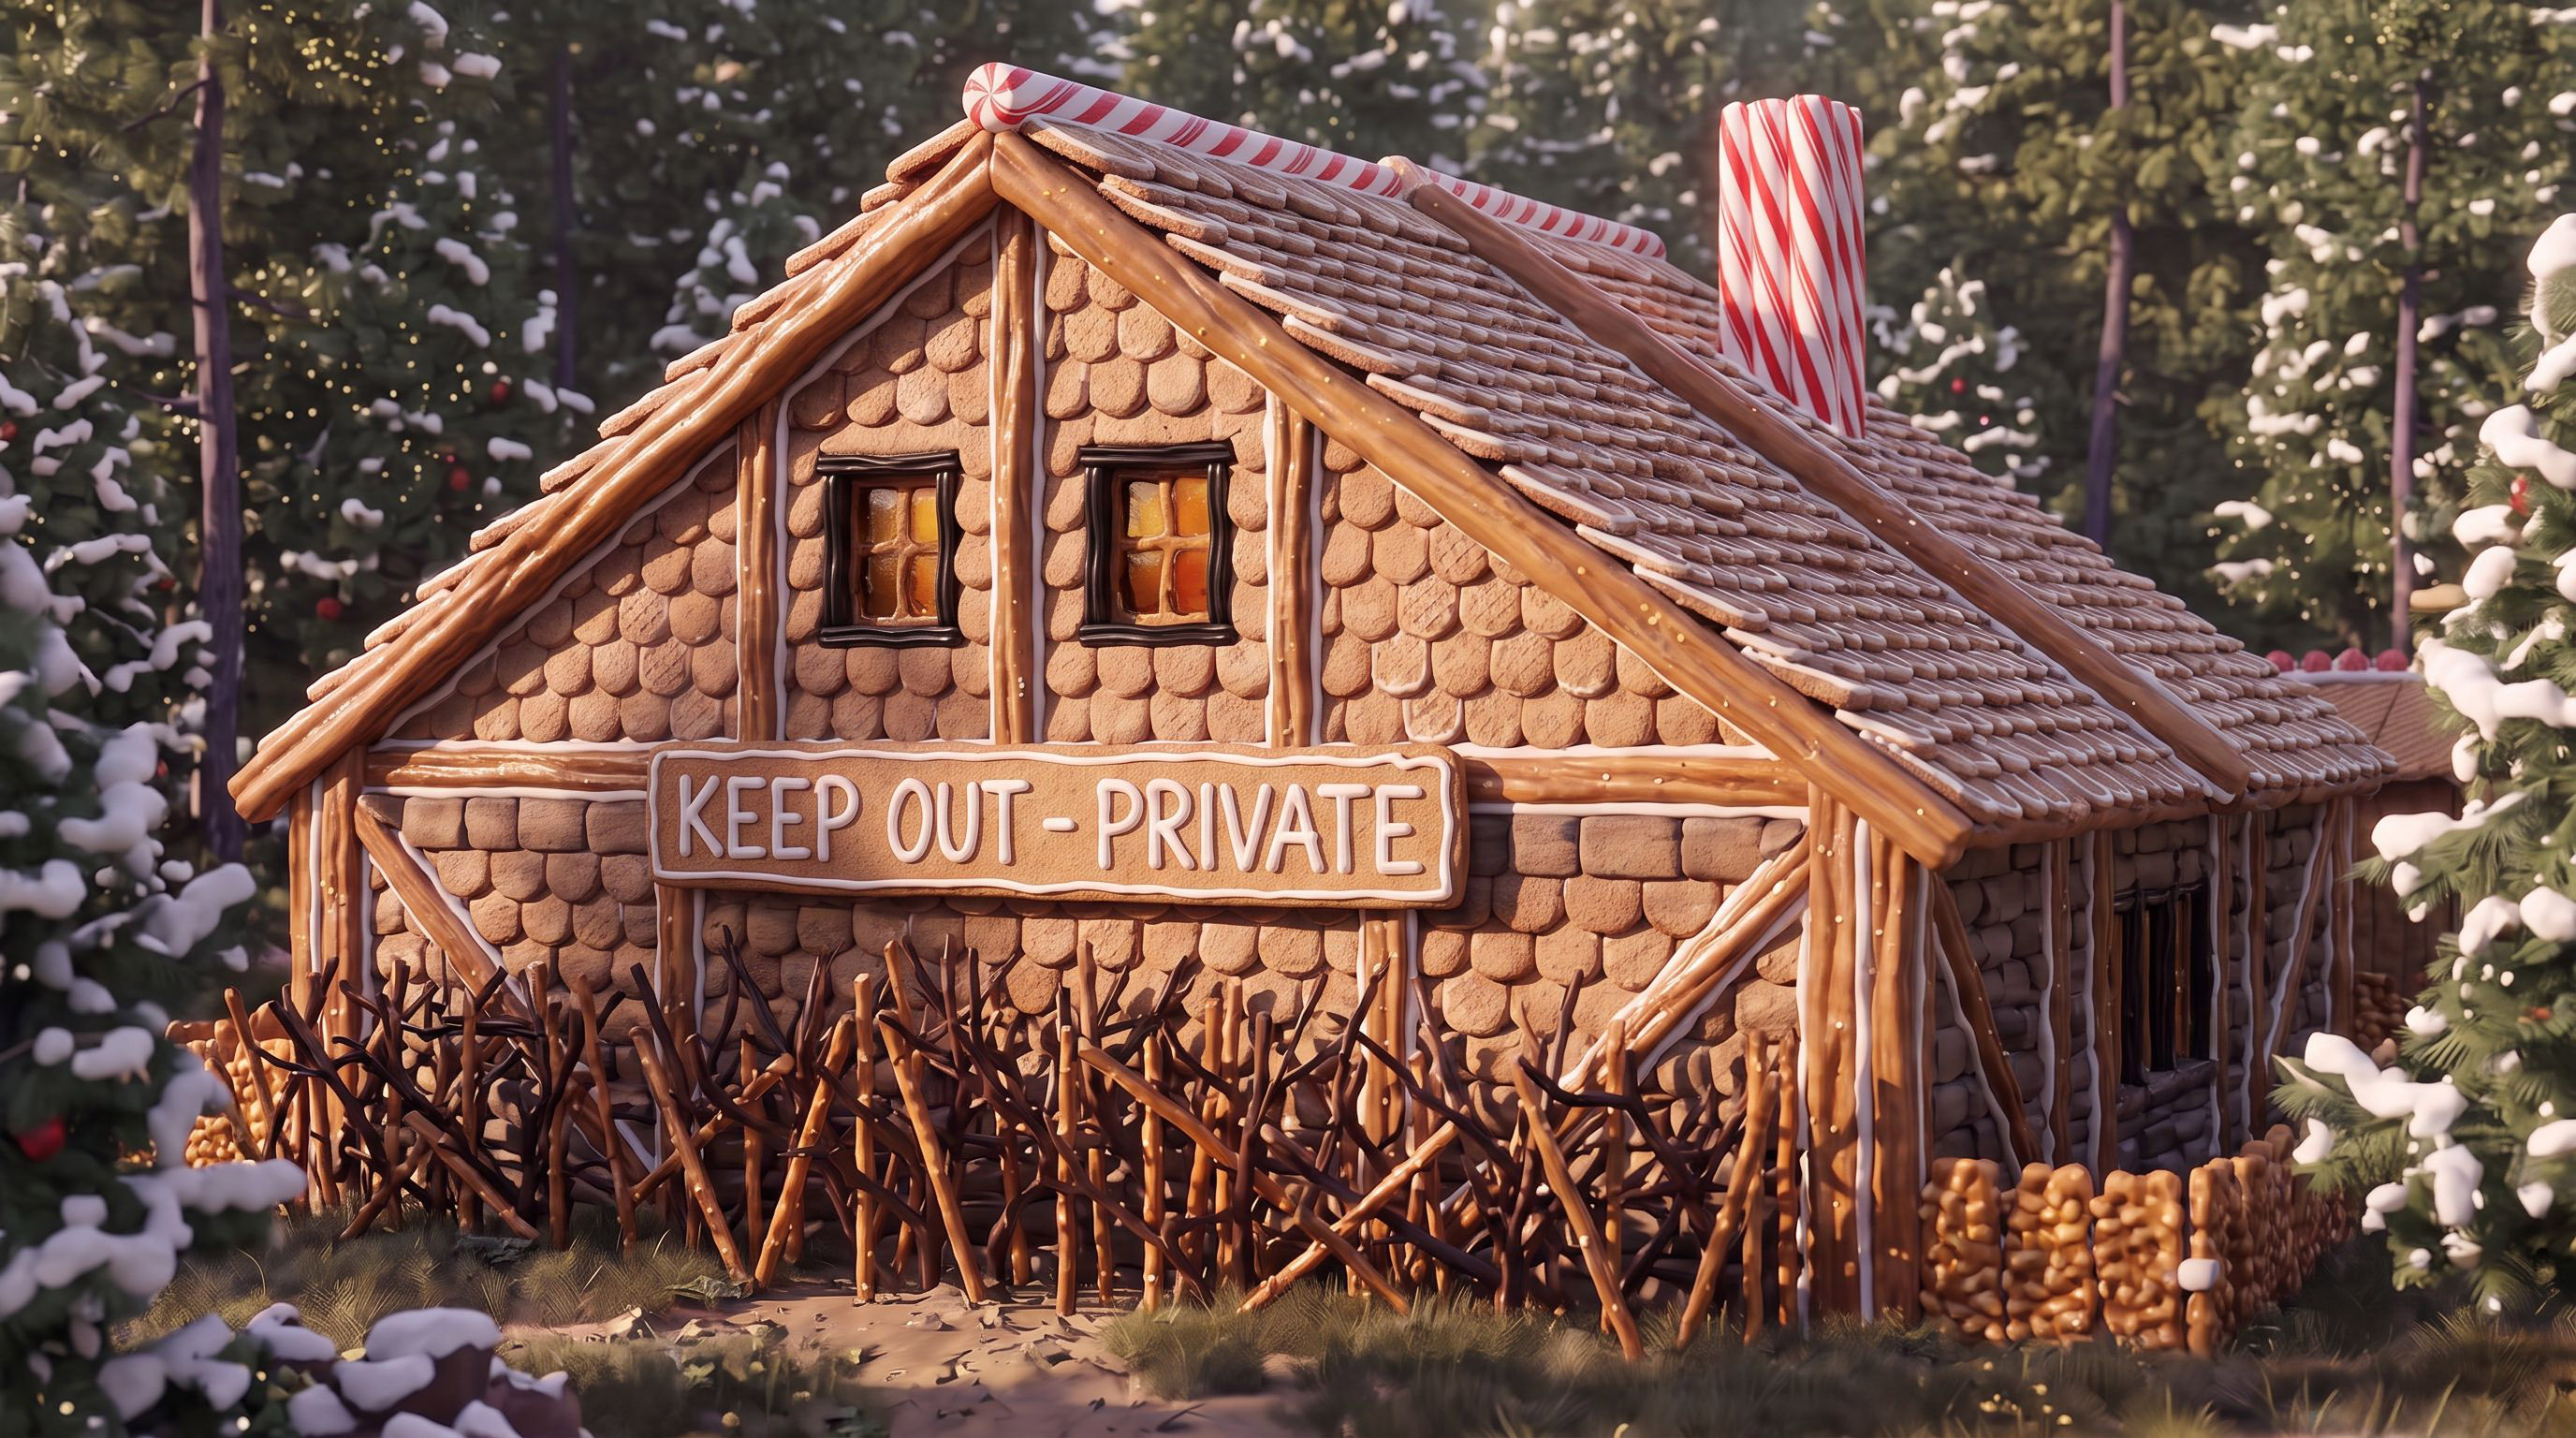
Draw the plans in chat
Everything above was built from text plans made in a chatbot, not in EDIT. Screenshot the set you want. That is what you upload to EDIT.
A short prompt lets the chatbot invent the house. This is how the witch house started:
Prompt — start the story
write about a fiction home of hansel and gretel. list all the architectural elements of the house, site map, floor plan of it.Once that site map and floor plan feel right, ask for the other views in the same chat:
Prompt — add the other views
Now draw the rest of the set in the same ASCII style: front elevation (south), east elevation, west elevation, rear elevation (north), and a roof plan. Label north. Keep the rooms and site you already drew.If you want less invention, paste this instead. It names the rooms, the site, and all seven sheets in one message. Swap the project paragraph for your own story.
Prompt — ASCII drawing set
Draw seven monospace ASCII architectural plans. Label north on every sheet. No dimensions, no room sizes, no title block. Use only the rooms and site named in the project. Do not add a driveway, lawn, shed, or extra bedrooms.

Elevations are exterior facades: roof, walls, door, windows, and signs. They are not another floor plan.

Each sheet is its own code block, followed by one sentence on what that sheet is for.

1. Site plan — clearing, path, oven, garden, well, cage, fence
2. Floor plan — the rooms named below
3. Front elevation (south) — the face visitors approach
4. East elevation
5. West elevation
6. Rear elevation (north)
7. Roof plan

Project: A gingerbread witch cottage in a forest clearing. Sugar path from the south. Stone oven, herb garden, well, iron cage, peanut-brittle fence. Dense woods and a thorn thicket to the north. Rooms: entry; great hall and kitchen with a fireplace tied to the exterior oven; witch den; guest bedroom. South face is welcoming: HOME plaque and gingerbread door. North face is fortified: small high windows, KEEP OUT - PRIVATE sign, thorns at the foundation.
When the set is close, paste all seven sheets back into chat and ask for layout alternates. Google AI Studio produced the clip above—any chatbot that prints text plans can do the same.
Prompt — three variations
Make 3 variations of each plan next to each other. On this chat they will lay out left, center, and right. Context below.Paste the site plan, floor plan, four elevations, roof plan, and the one-line description under each sheet—the same block you used to draw the set. Screenshot the winner, then open EDIT.
How this witch house was made in EDIT
The steps below start after a floor plan screenshot was chosen.
Upload the plan
Click + New. Upload one sheet at a time, cropped tight, with no title block.

Upload the floor plan you settled on. Step 1 is the image in the pair at the top of this page.
Step 1 — Lock the layout
Start with solid white walls so partitions stay put before texture or furniture.
Prompt — layout lock
Generate a photorealistic, unannotated 3D top-down architectural floor plan rendering with maximum structural fidelity. The wall partitions, door openings, and room layouts from the diagram are immutable. Walls are rendered as solid white architectural massing with clean, flat white tops. The floor surfaces must be completely clean and free of any text, labels, or markings. Witch house 3D floor plan. Rooms: Entry; Living/Dining (Great Room) with fireplace tied to the exterior oven; Kitchen; Witch Den; Guest Room. Include site elements from the diagram: stone oven, herb garden, well, cage, and shed.Step 2 — Add materials
Swap white massing for stone and timber. Keep the same top-down view.
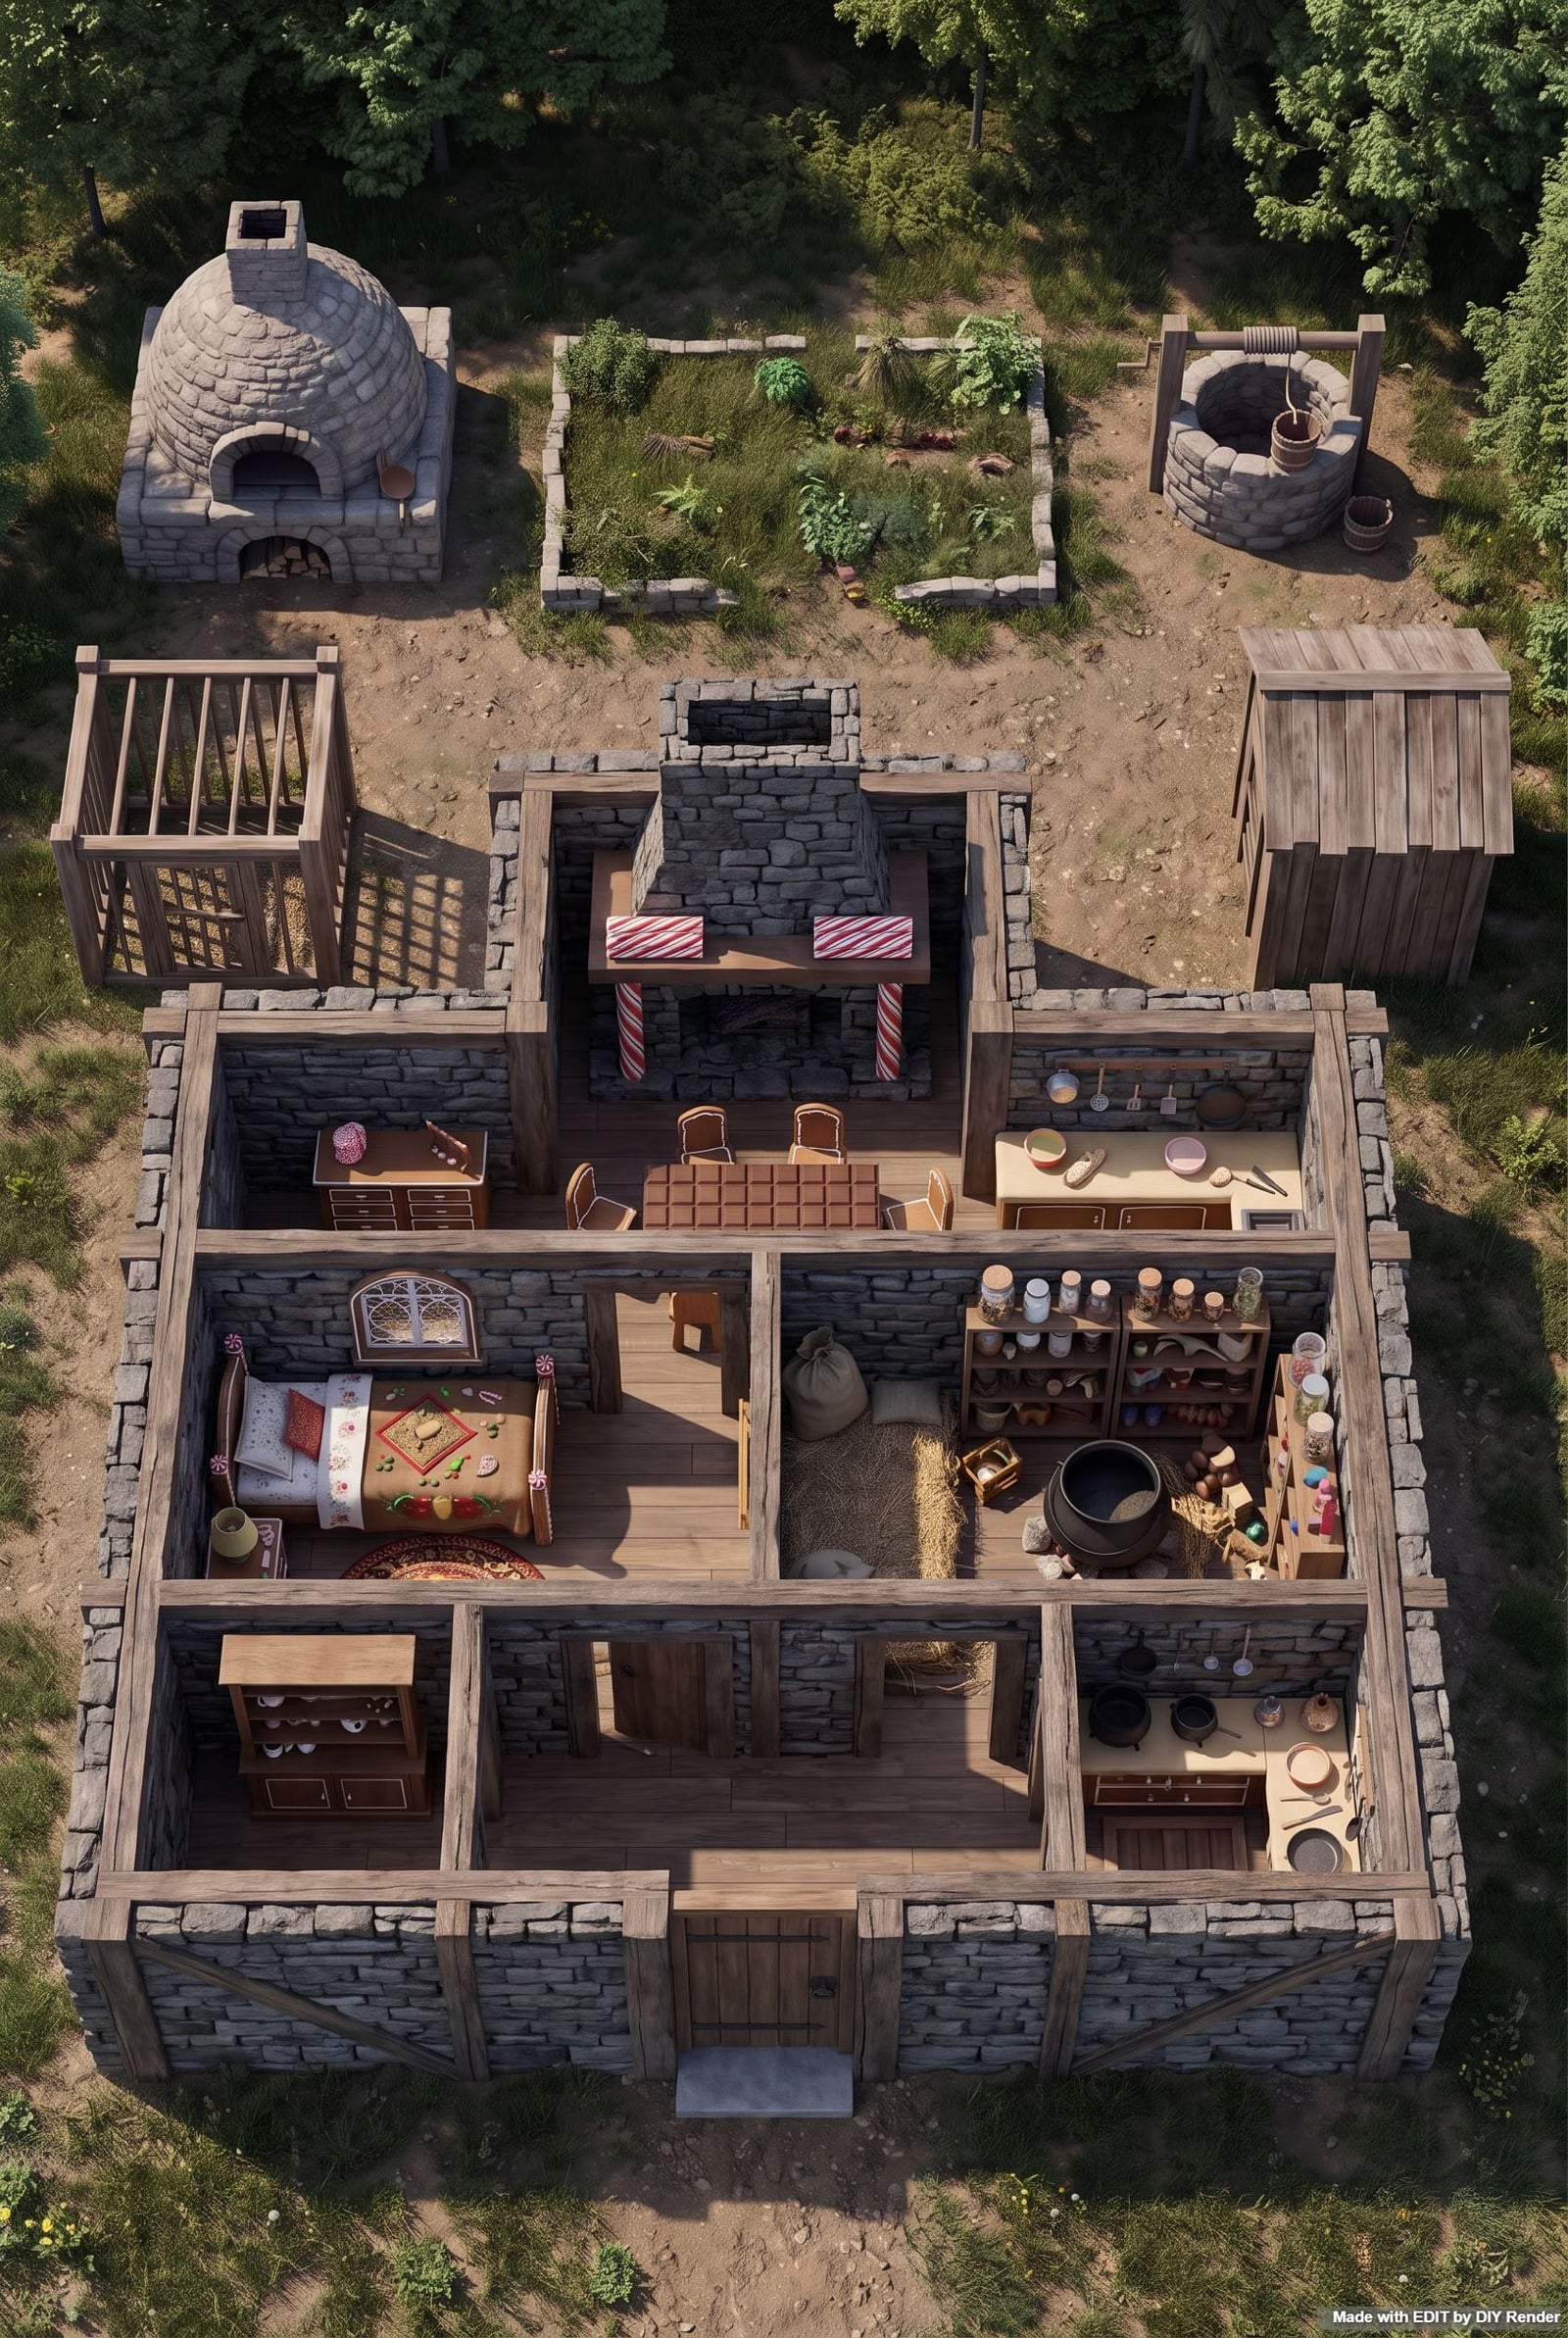
Prompt — materials
Replace the smooth white interior walls with dark, weathered stone blocks and exposed reclaimed timber beams throughout the rooms, maintaining the exact floor plan, furniture placement, and top-down dollhouse perspective.Step 3 — Add the roof
Establish pitch, chimneys, and shingle direction. The front may still read as open.

Prompt — roof, first pass
Add a simple gable roof running east-west that covers the entire stone cottage structure shown in the floor plan. The roof features weathered asphalt shingles and incorporates the decorative peppermint main chimney and the utilitarian oven chimney piercing the slopes. Preserve the exact orthographic perspective, stone walls, and surrounding site elements from the original image.Step 4 — Close the roof
Attach the roof plan as a reference. Extend shingles over the open front. This is the still you restyle from.

Prompt — close the roof
Extend the roof shingles completely over the open front portion of the cottage, closing the structure into a fully covered dwelling. Maintain the exact pitch, shingle texture, timber framing, and architectural style of the existing roof and walls. Lock all vanishing points and room layouts. Use the reference roof plan as a guide for the rest of the roof.Step 5 — Restyle in place
Same aerial camera. Swap materials only.
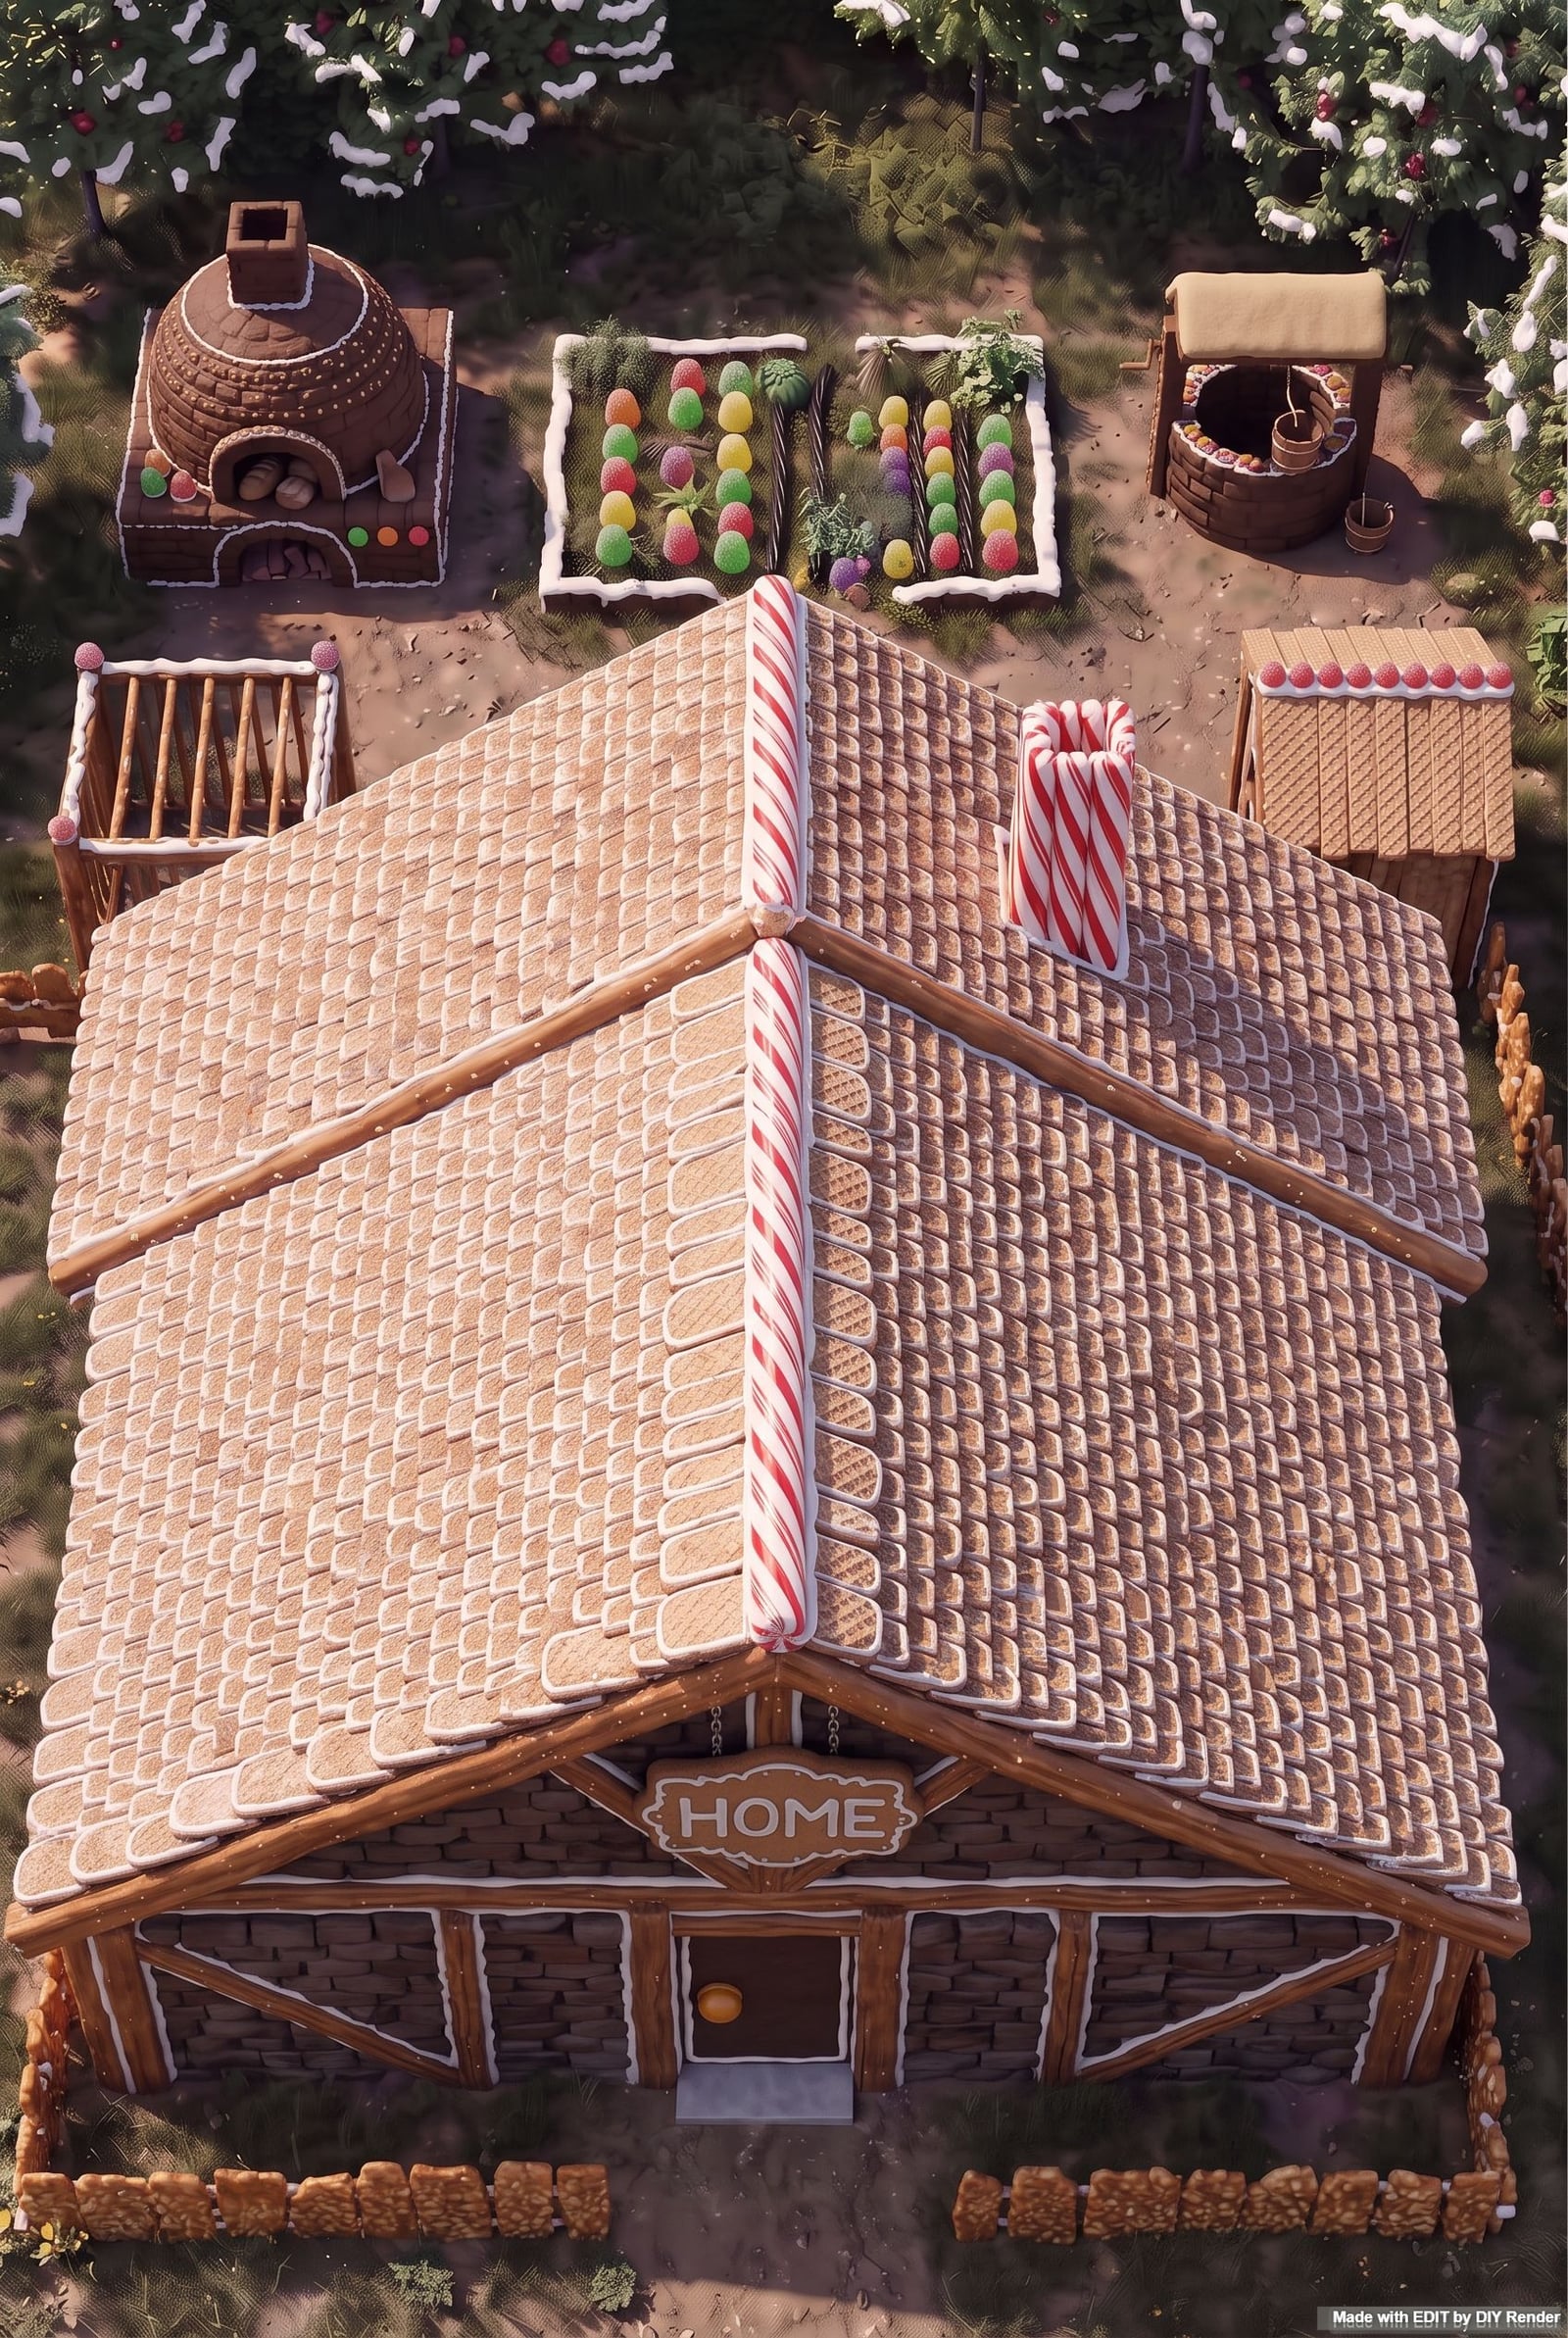
Prompt — gingerbread restyle
Same aerial isometric camera and composition. Restyle only: medieval stone cottage and site become a gingerbread fairy-tale version (gingerbread shingles, icing trim, peppermint chimneys, candy garden, sprinkle path, peanut-brittle fence, HOME cookie plaque, ginger-snap door). Keep oven, well, cage, and shed in identical positions. Top-down isometric view only.Step 6 — Front view
Reference tab: south elevation plus the gingerbread aerial. 16:9 Pro. The elevation sets the facade. The aerial sets massing. The prompt sets the candy.
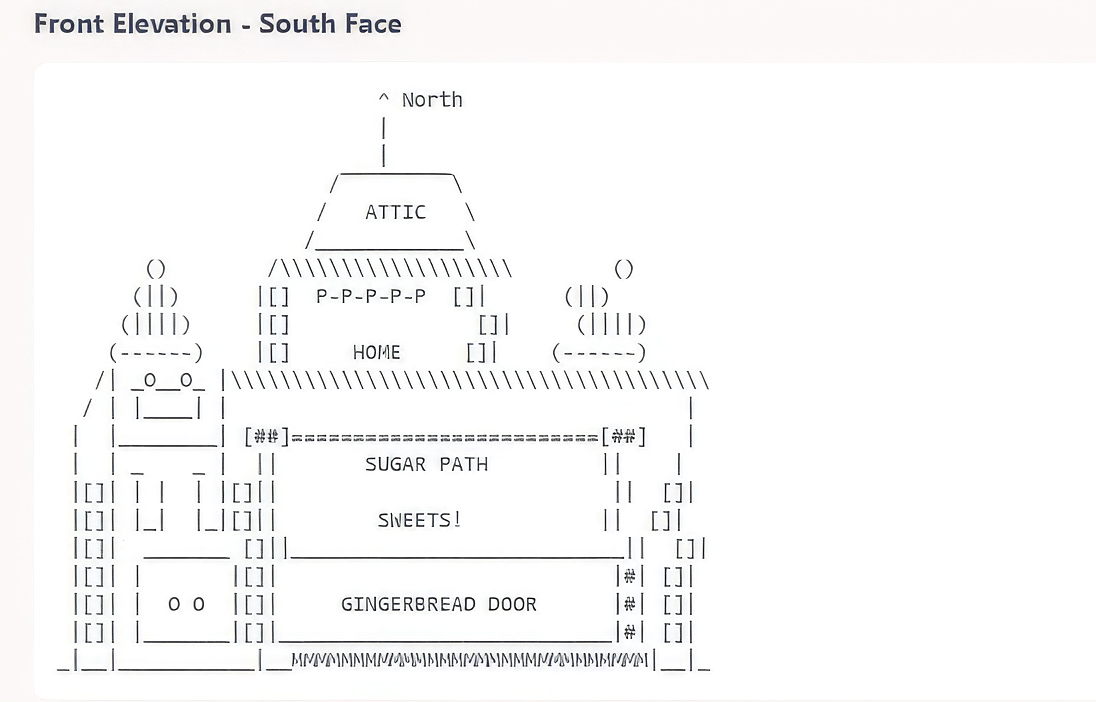
Prompt — front view
Generate a pedestrian-height front two-sided exterior view of the medieval stone cottage. Maintain composition of all elements. Update all textures. Featuring decorative peppermint stick chimneys, HOME cookie plaque, licorice-framed windows with wafer shutters, and the gingerbread door with butterscotch knob. The peanut brittle fence and sugar path complete the inviting, storybook presentation.Step 7 — Rear view
Same setup: north elevation plus the aerial. Daylight snow is the plate you animate later. A night plate is a separate still, used only as the end frame of the storm clip.
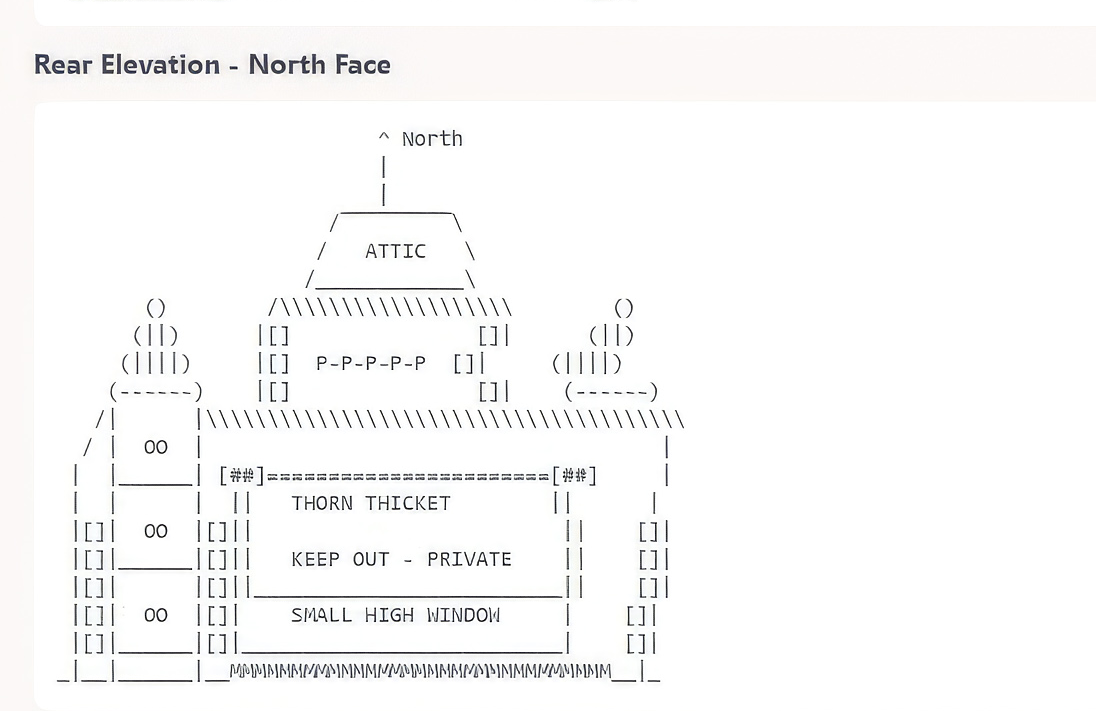
Prompt — rear view
Generate a photorealistic two-point perspective rear view of the gingerbread house focusing on the north and west facades, following the attached rear elevation and top view. The north facade has small high windows with dark licorice frames, amber barley-sugar glass, and a candy-lettered KEEP OUT - PRIVATE sign. Match the pretzel timber framing, scalloped gingerbread shingle roof, and peppermint stick chimney. Warm afternoon light and a secluded forest.Step 8 — Detail grid
One 3×3 from the finished front, rear, and aerial. A whole contact sheet as a video first frame comes back as nine pictures. Crop one panel, or upload the grid and have EDIT enlarge that panel to a full still.
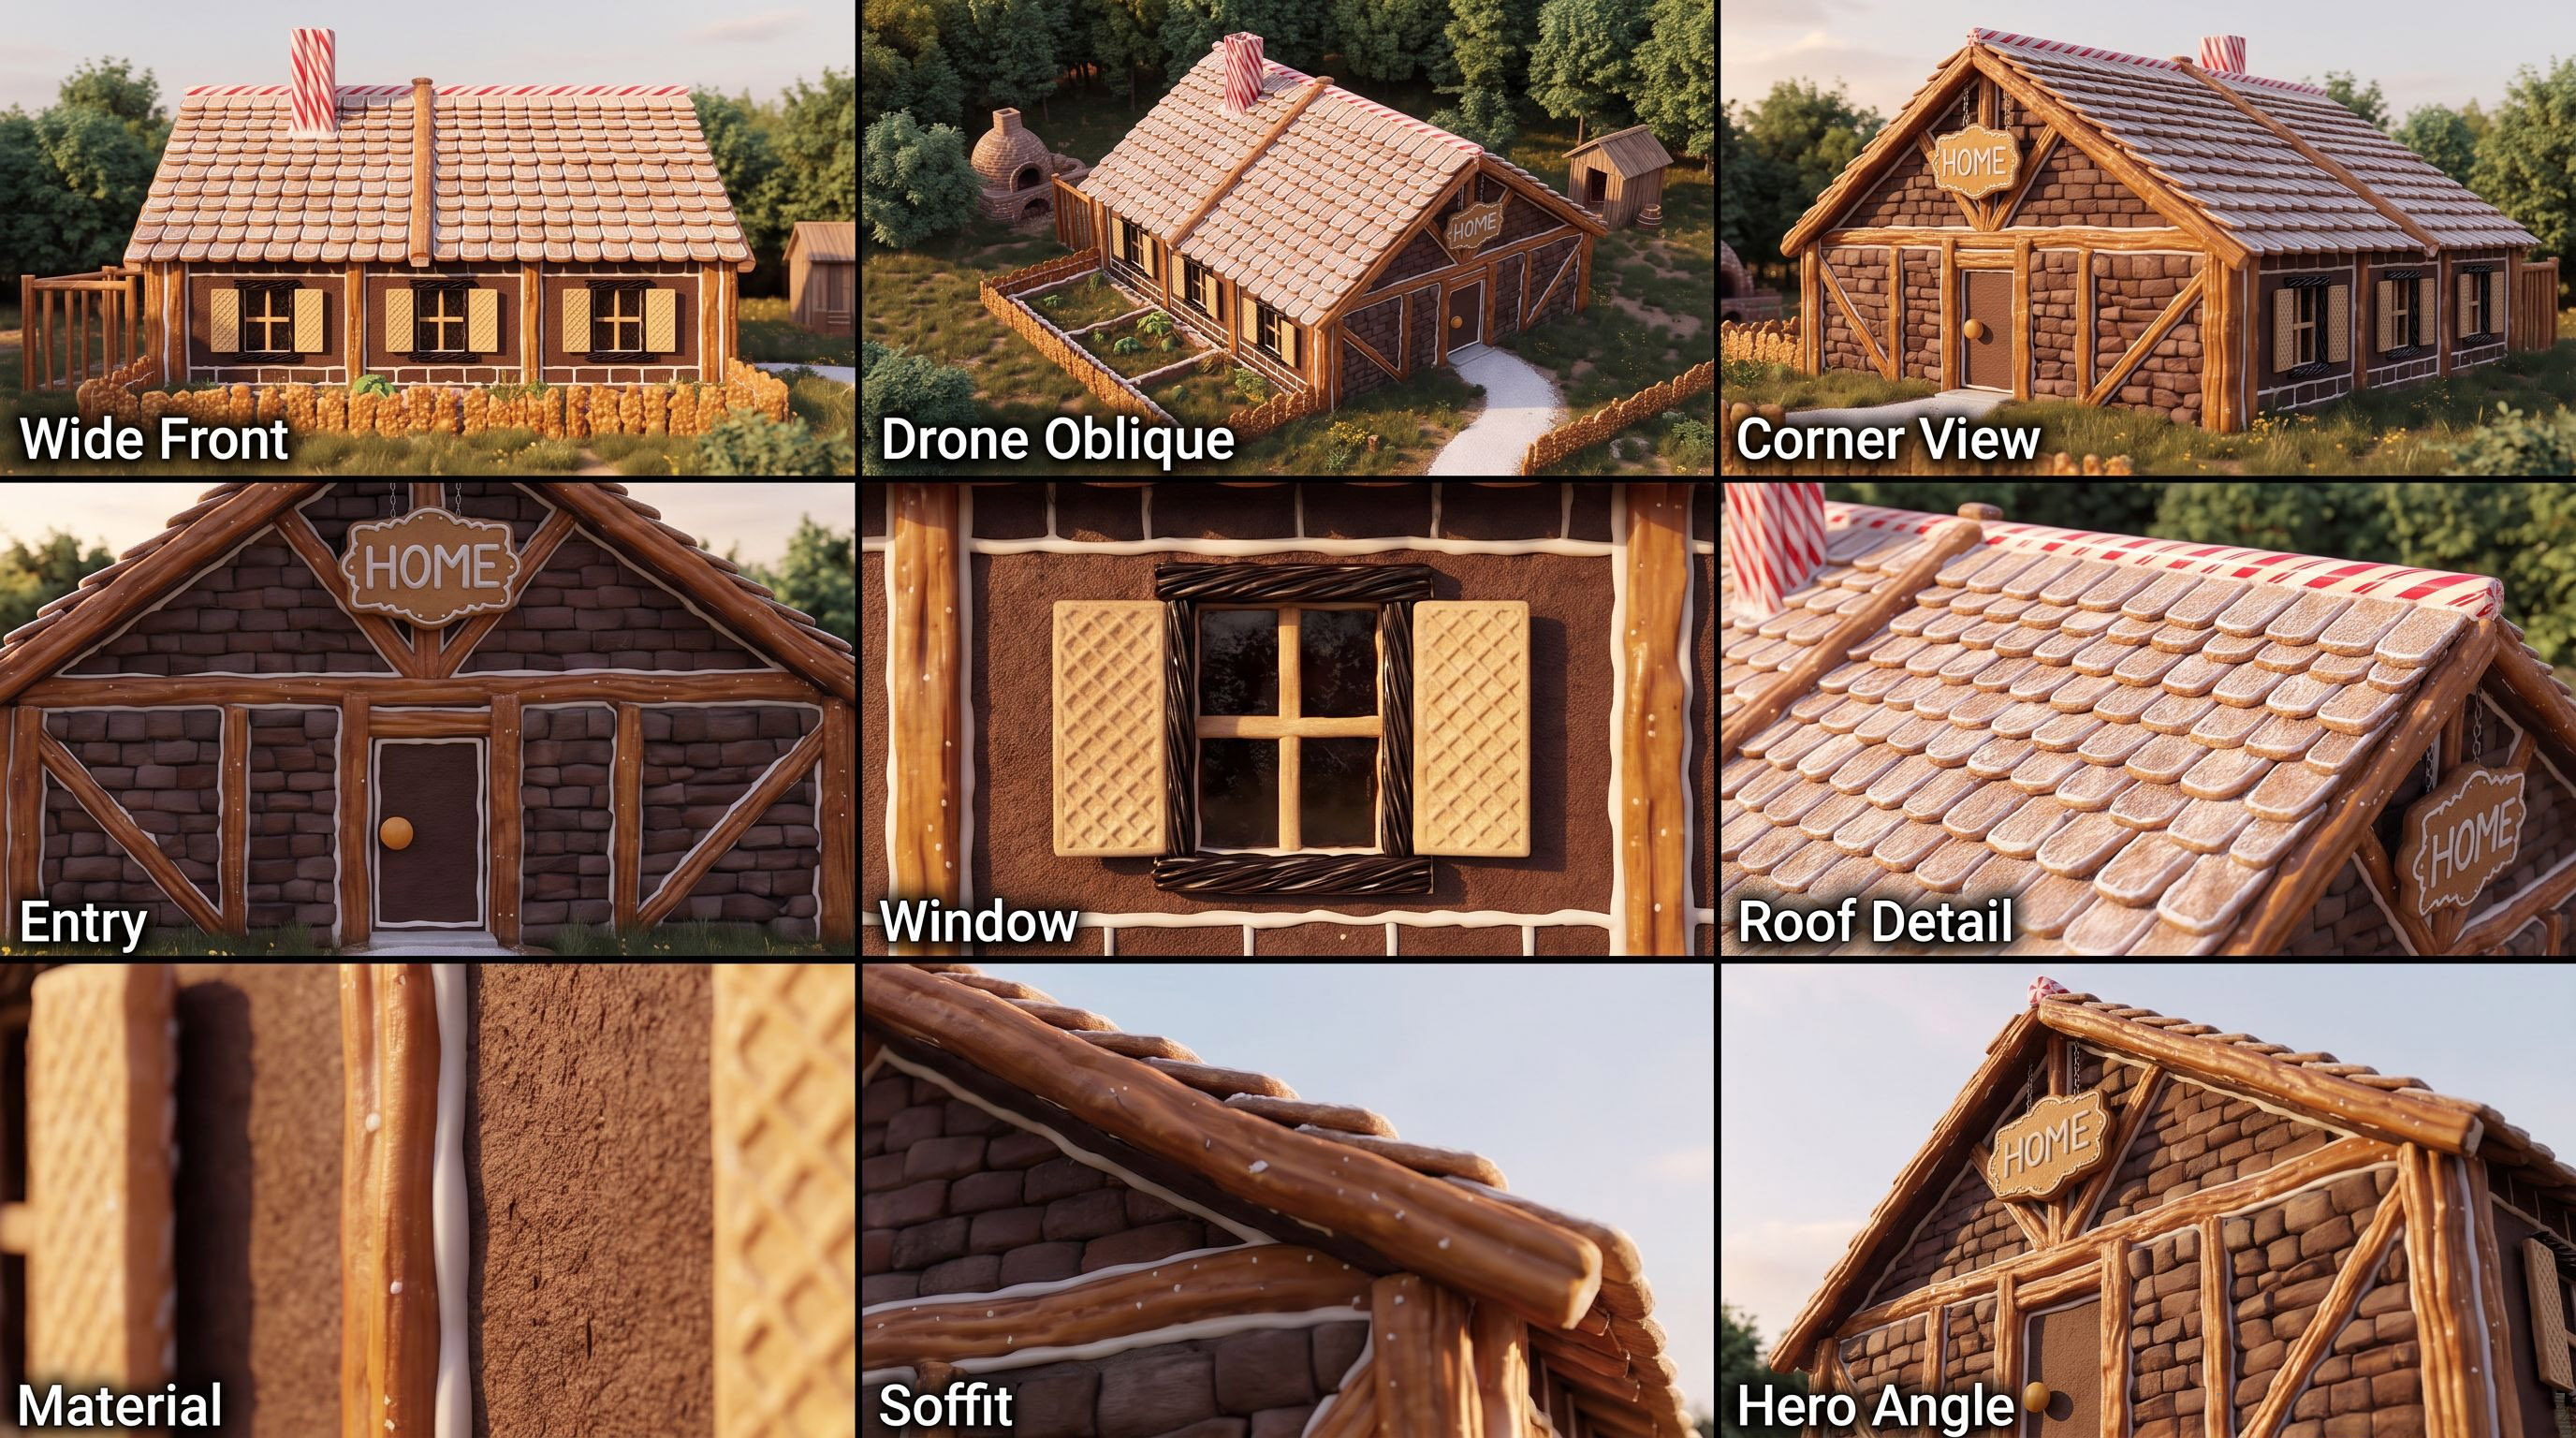
Prompt — detail grid
Generate a 3x3 grid of distinct architectural details showing close-ups of the gingerbread cottage. Each of the 9 panels displays a unique macro shot: the frosted tile roof shingles, the candy-cane ridge and chimney, the pretzel-stick fence, the HOME icing sign, the cookie wall texture, the icing mortar lines, the graham cracker shutters, the marzipan garden plants, and the wooden door with a gumdrop knob. Maintain consistent photographic lighting and clean panel borders across the entire grid.Prompt — enlarge one panel
Take the [PANEL NAME OR LOCATION] panel frame and regenerate it as a full-screen, 4K image. Retain the exact composition, lighting, and style of the source panel, but render it as a standalone, high-resolution photo.Step 9 — Cut the film
EDIT stops at stills. The film is three clips from P-Video 2 Pro, then a hard cut in an editor. The model takes one first frame and an optional last frame. It does not take a stack of reference images. aspect_ratio is ignored when a still is attached.
Draft in mode: speed at 480p. Rerun the same prompt and seed in mode: quality at 768p when the move is right. Set prompt_upsampler to off so the timed camera move is not rewritten. Duration on this film is 7 seconds. Write the sound in the prompt. There is no audio upload.
Name the subject, the move, and the light. One move per clip. An orbit from the sunny front to the night rear in a single generation melts the side walls.
Clip 1 — Front
First frame only: the summer front still. 0–5s pans until the front is centered. 5–7s pulls in while the light warms.
Prompt — front clip
Photoreal architectural visualization of a gingerbread cottage in a forest clearing. No people. The south front matches the reference frame: HOME plaque, sugar path, peanut-brittle fence, shuttered side wall, peppermint chimney, and stone oven. Keep the building silhouette, roofline, door, window count, and chimney position sharp and unchanged. Soft cool morning light at the start. 0–5s: the camera starts just left of the front facade and pans right until the front is centered. 5–7s: the camera slowly pulls inward toward the house while the light warms into a bright sunny afternoon. Subtle foliage movement only. No captions, no on-screen text, no logos invented. Audio: quiet forest ambience, light breeze, no music, no voiceover.Clip 2 — Rear
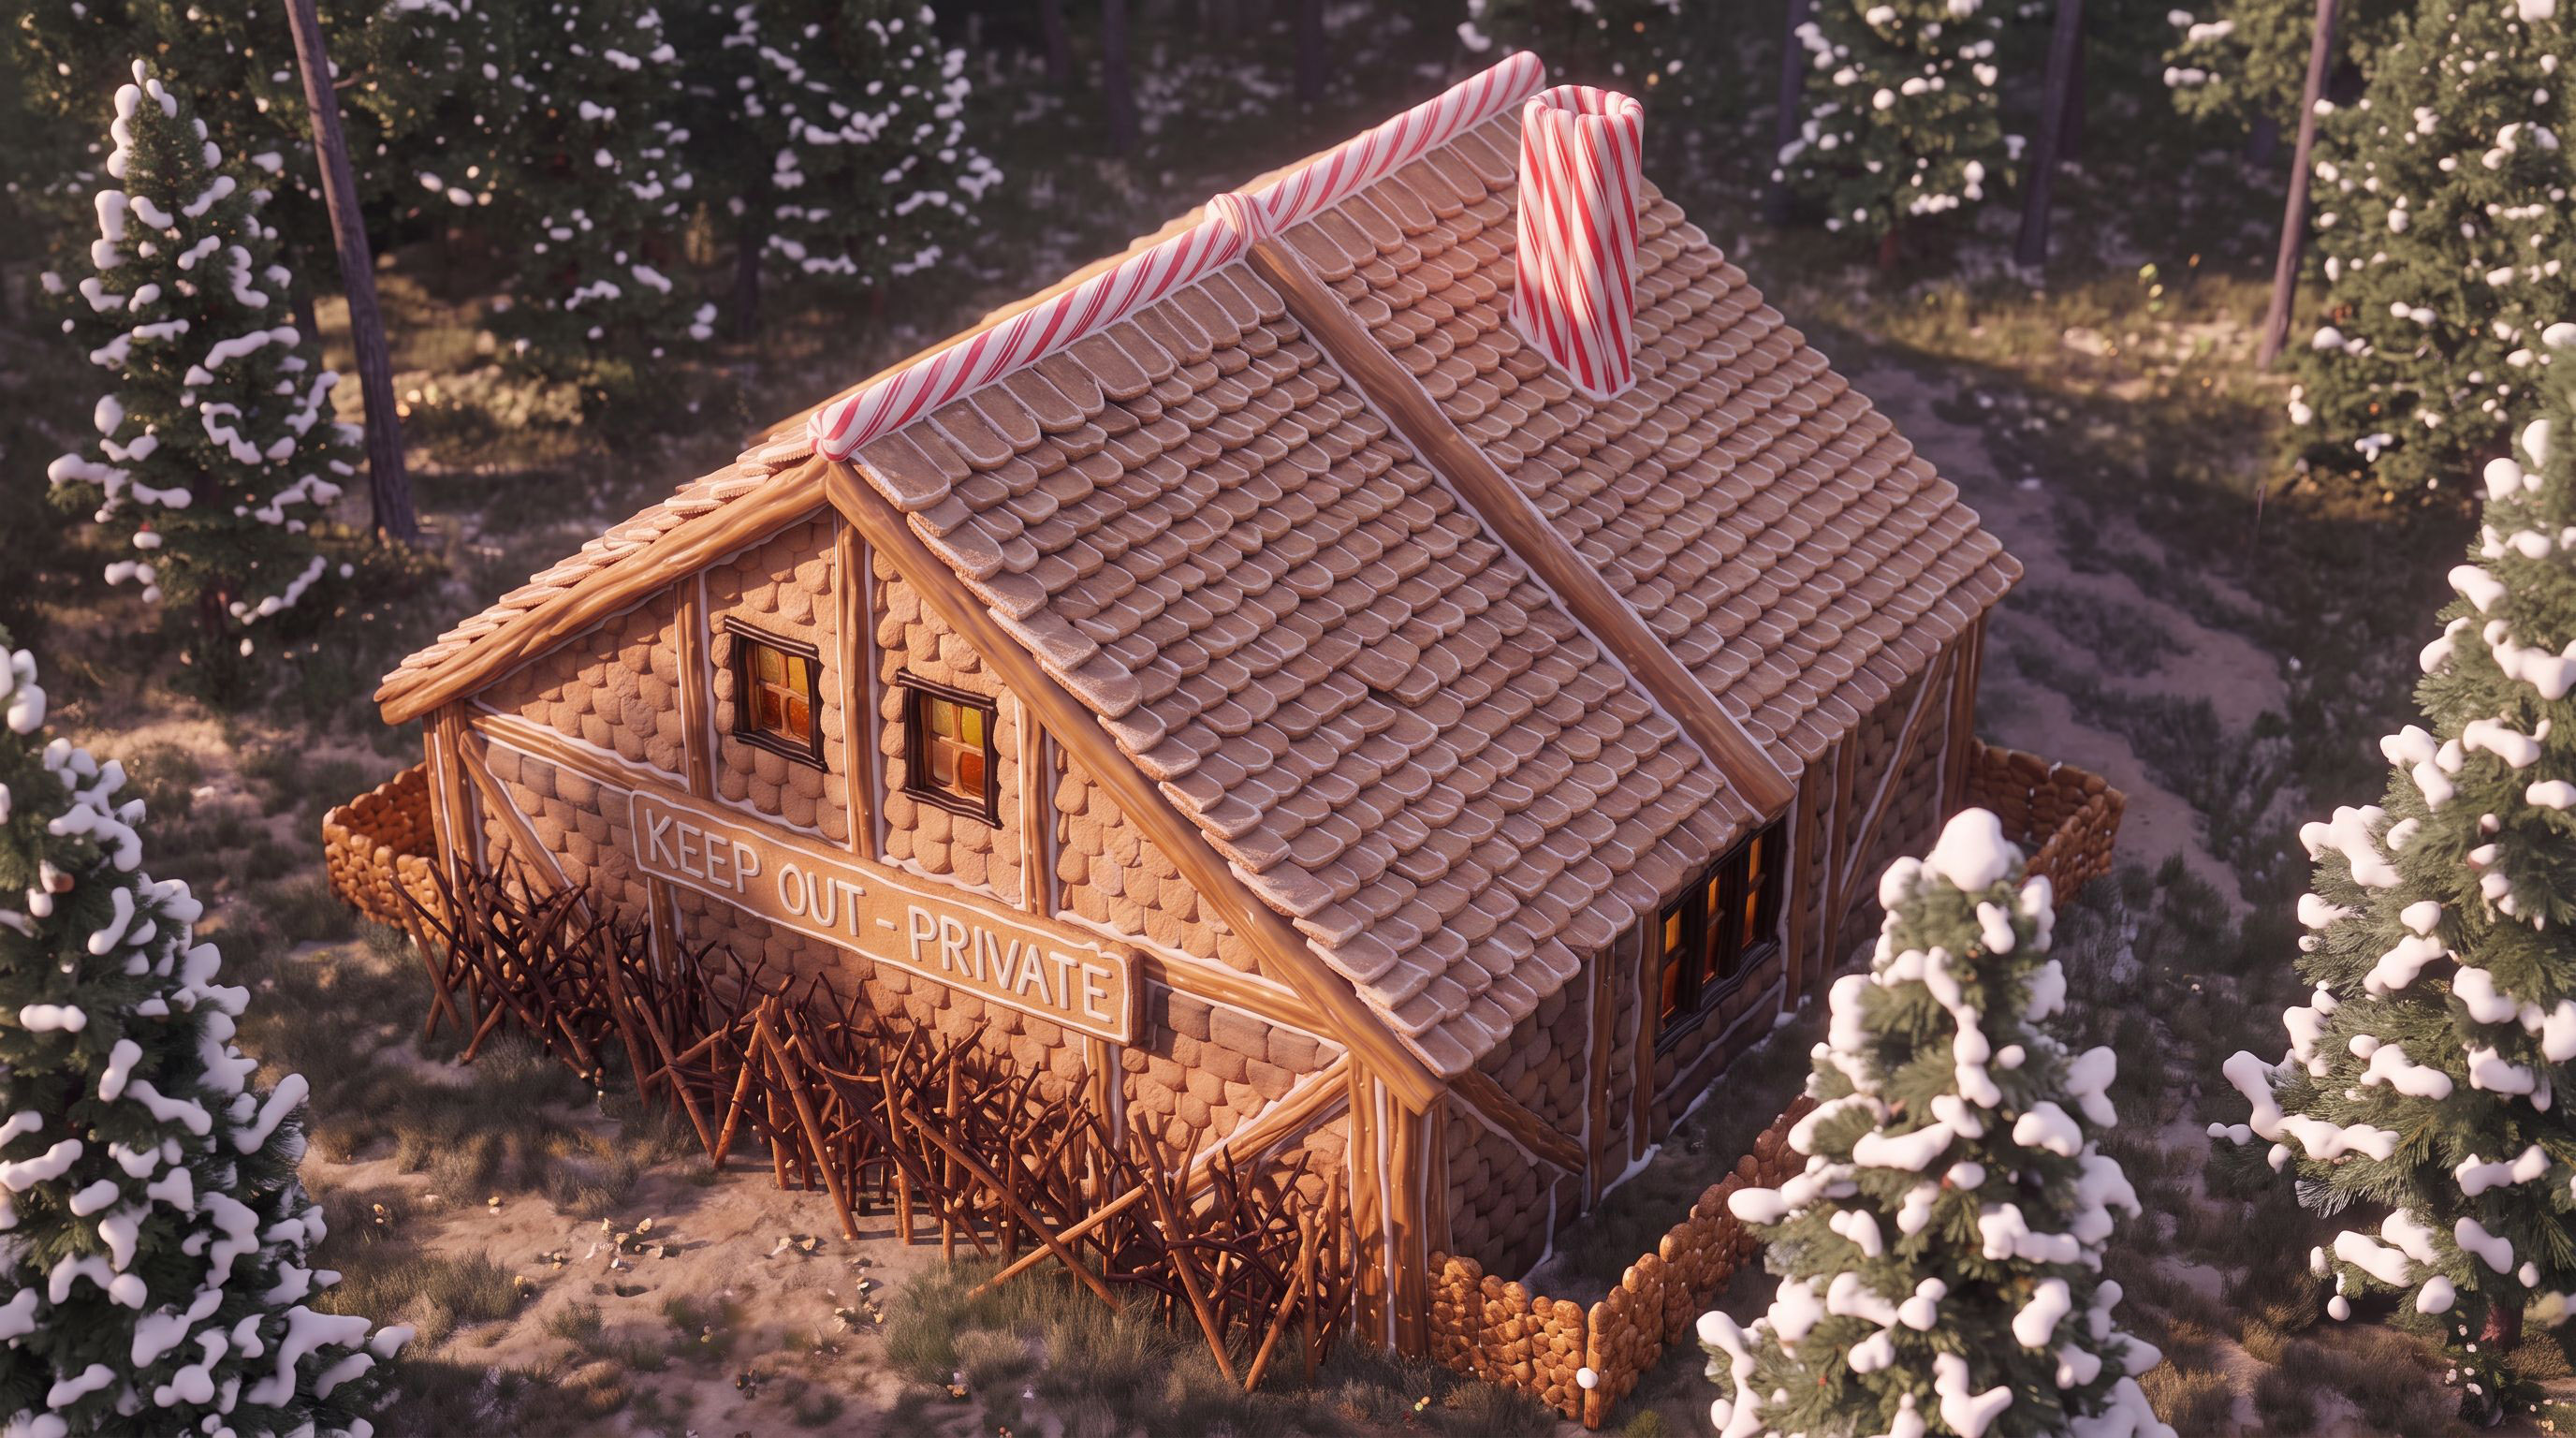
First frame: drone oblique of the rear. Last frame: the daylight rear still. The model travels from the high view down to that facade.
Prompt — rear clip
Photoreal architectural visualization of the north rear of a gingerbread cottage in a pine forest. No people. The cottage matches the reference frames: KEEP OUT - PRIVATE sign, thorn fence, peppermint chimney, scalloped rear wall, and amber window glow. Keep the building silhouette, sign lettering, window count, and chimney position sharp and unchanged. Warm late-afternoon light. The camera begins in a high oblique view and moves smoothly down and forward until it matches the centered north rear facade, then slowly pulls inward toward the sign. Subtle wind in the trees only. No captions, no on-screen text, no logos invented. Audio: quiet forest ambience, light breeze, no music, no voiceover.Clip 3 — Storm
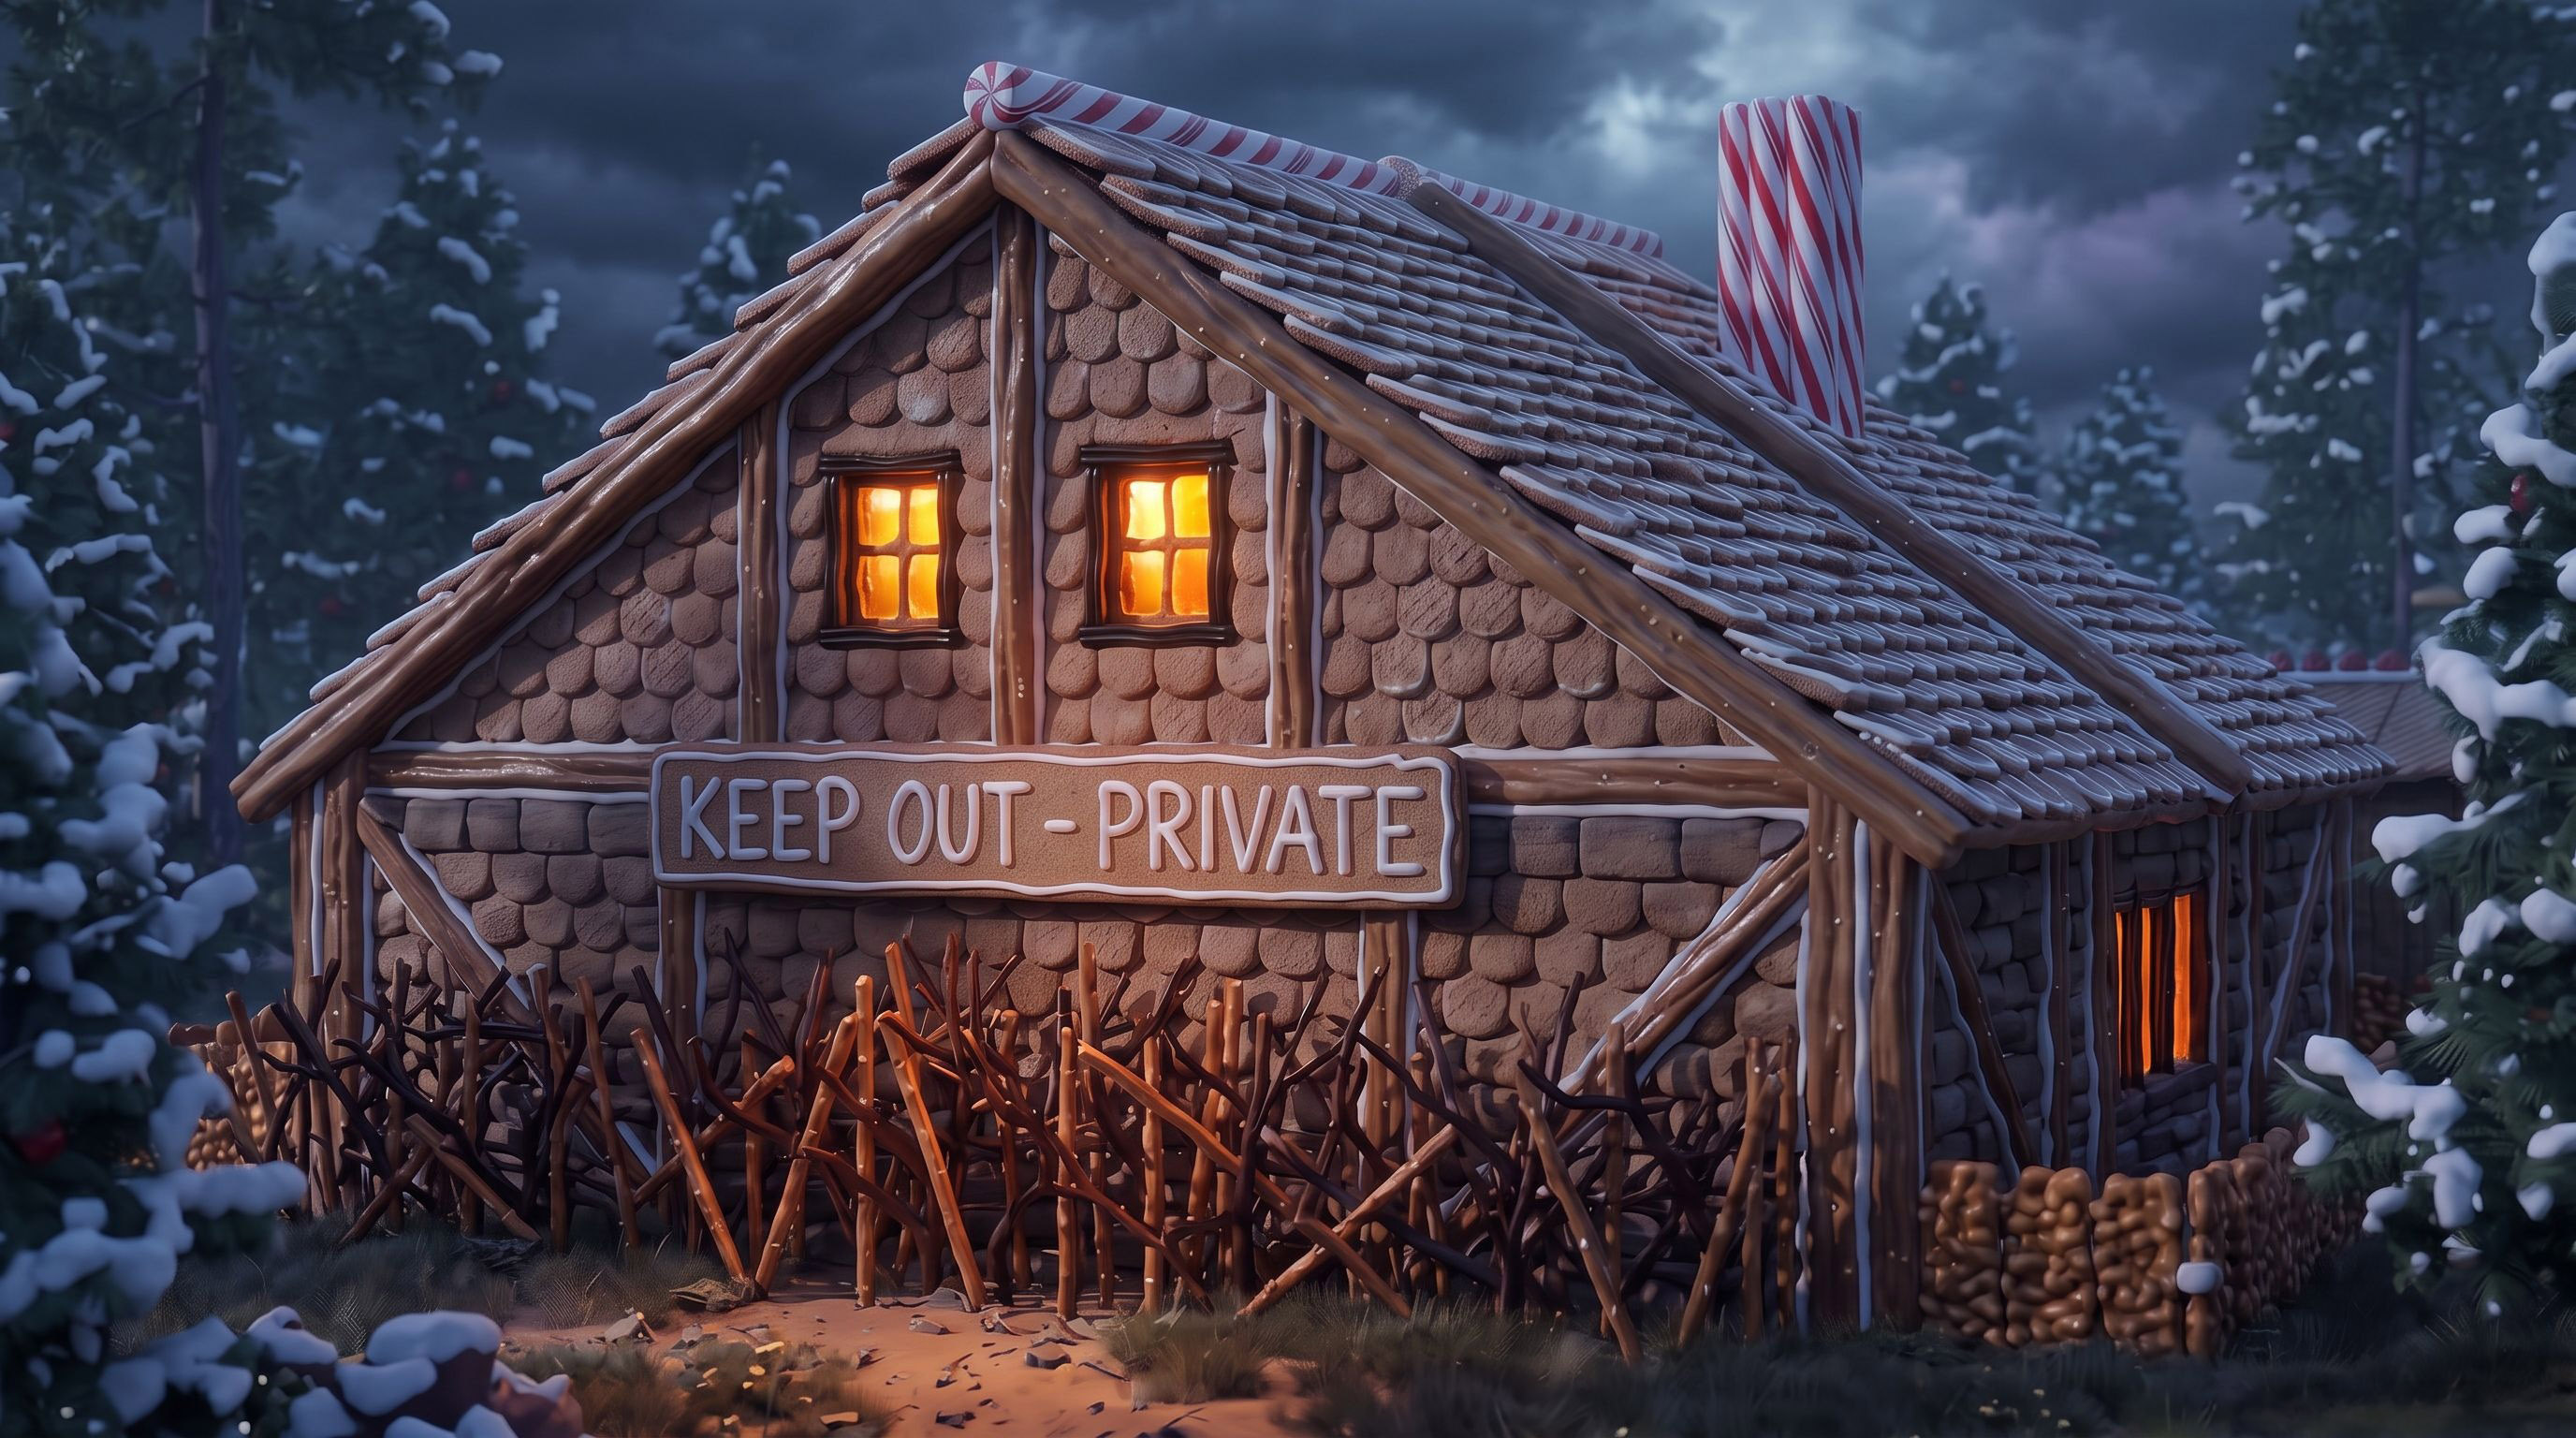
First frame: the daylight rear. Last frame: the night rear. Lightning and the pull-in happen after a short hold.
Prompt — storm clip
Photoreal architectural visualization of the north rear of a gingerbread cottage. No people. The north gable matches the reference frames: KEEP OUT - PRIVATE sign, thorn fence, peppermint chimney, and lit windows. Keep the sign, window count, and massing sharp and unchanged. 0–2s: hold on the north rear in winter daylight. 2–7s: the camera slowly pulls inward while the sky turns dark and stormy, lightning flashes, two split-second white flashes, and the windows glow warmer. Subtle wind in the trees. No captions, no on-screen text, no logos invented. Audio: distant thunder, wind, no music, no voiceover.Cut the three clips in that order. Hard cuts. The sunny front never shares a generation with the night rear.
More guides
Same app, earlier jobs:
- 2D to 3D floor plans — the dollhouse chain, without the film
- 3D elevations — a drawn elevation is stricter than ASCII
- Concept aerials — lock layout, then restyle
Browse every how-to with previews: All guides.
Start from a sketch. Lock the plan before you restyle.
Try EDIT free — no credit card.