Appearance
Concept aerials
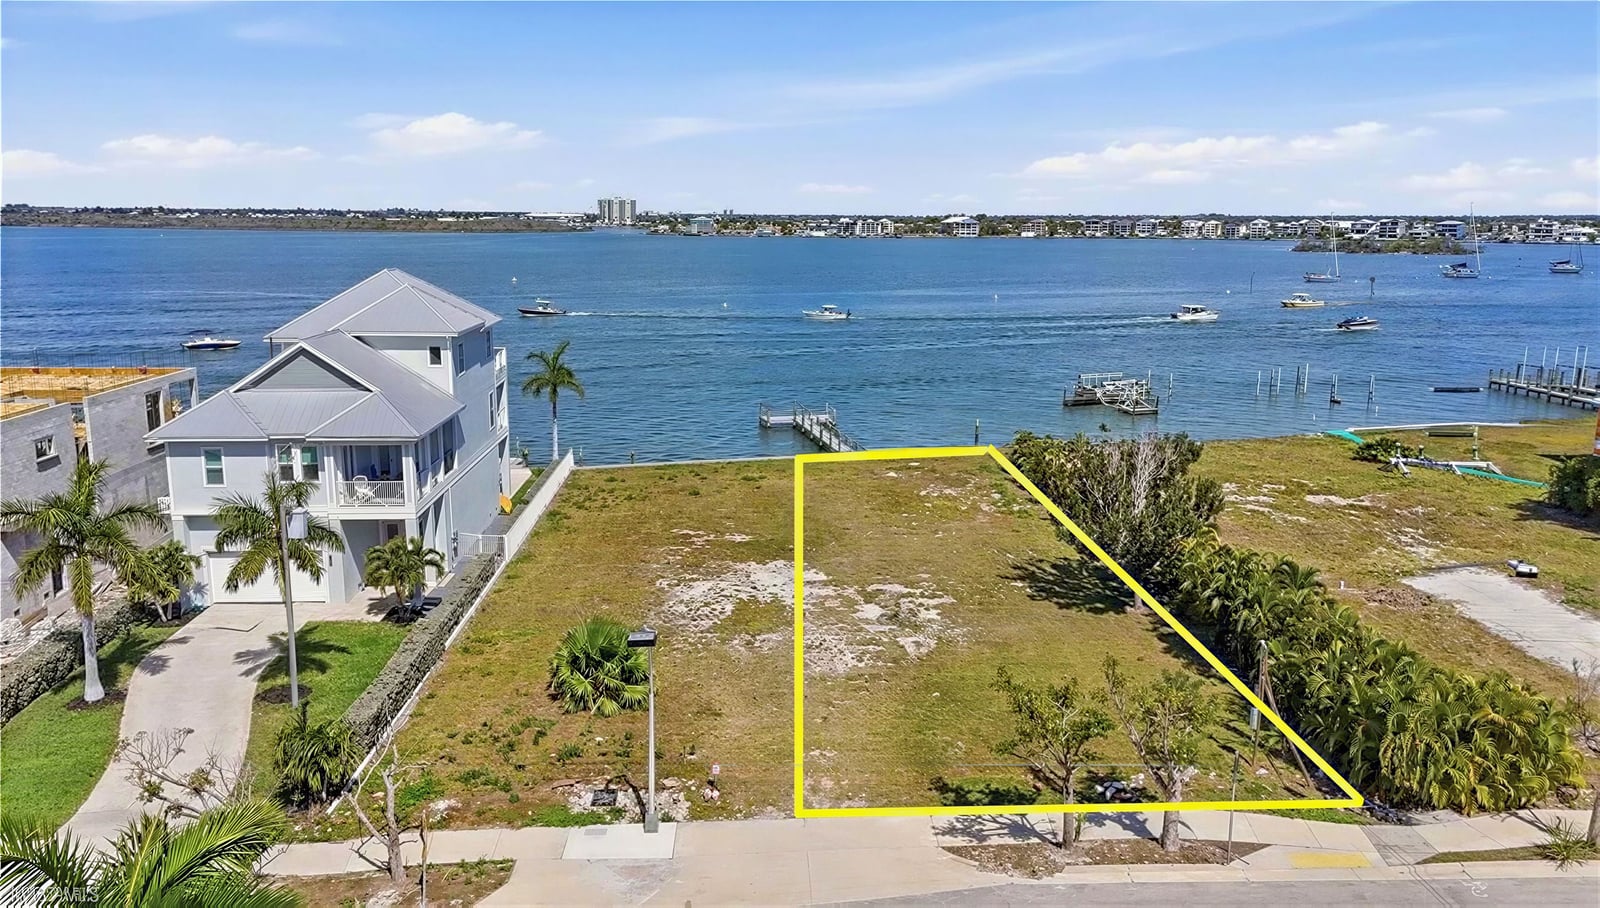
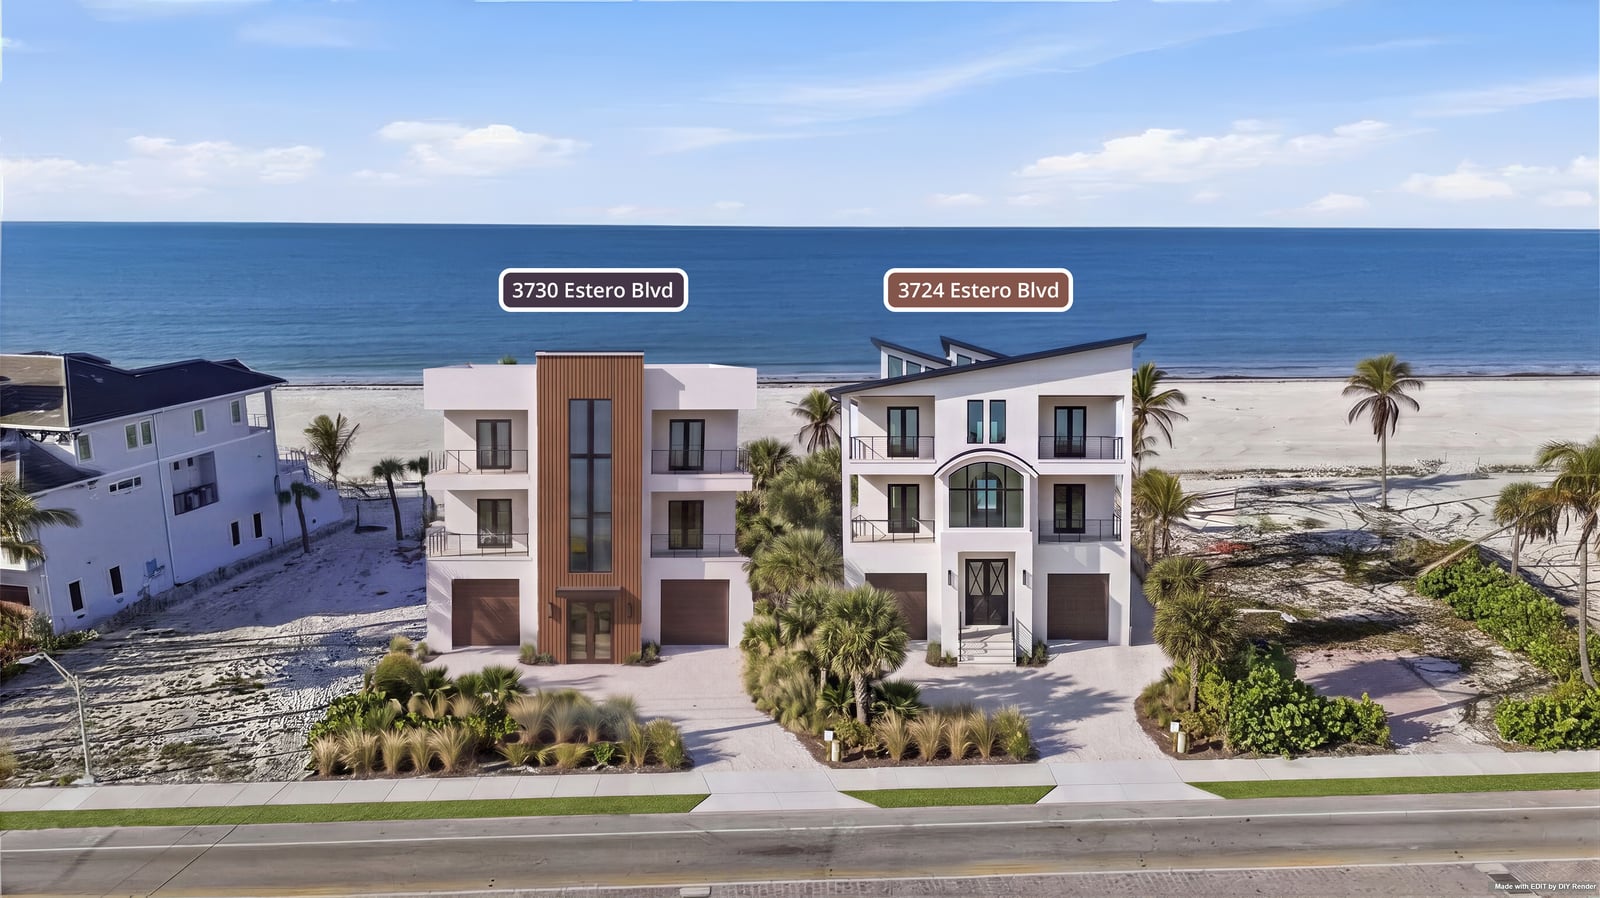
Show a proposed building on a real lot photo—fast enough for zoning conversations, investor decks, and tight deadlines. This is EDIT plus Photoshop when scale or engineering needs a human hand.
When to use this (and when not to)
| Situation | Best path |
|---|---|
| Full architectural drawings | Real 3D—accuracy, consistency, and what the client’s client expects at build-out |
| Civil site plan on an aerial | Concept aerial—geometry is already defined |
| MLS / satellite lot, minimal brief, tight deadline | Concept aerial—expect Photoshop rescue work |
| Unresolved engineering (ramps, structure, code-driven layout) | Fix the brief first—AI will guess, and guess wrong |
Concept aerials sell the idea. Production 3D proves the drawing.
What you need before you start
- Aerial or satellite base — MLS, drone, or map capture. Upscale or source a higher-res original if faces and roof edges are mushy.
- Lot boundary — mandatory. Use Refine in EDIT to mark the buildable area (red line works). You can also draw a yellow guide on the image in any markup tool—Photoshop is not required for this step.
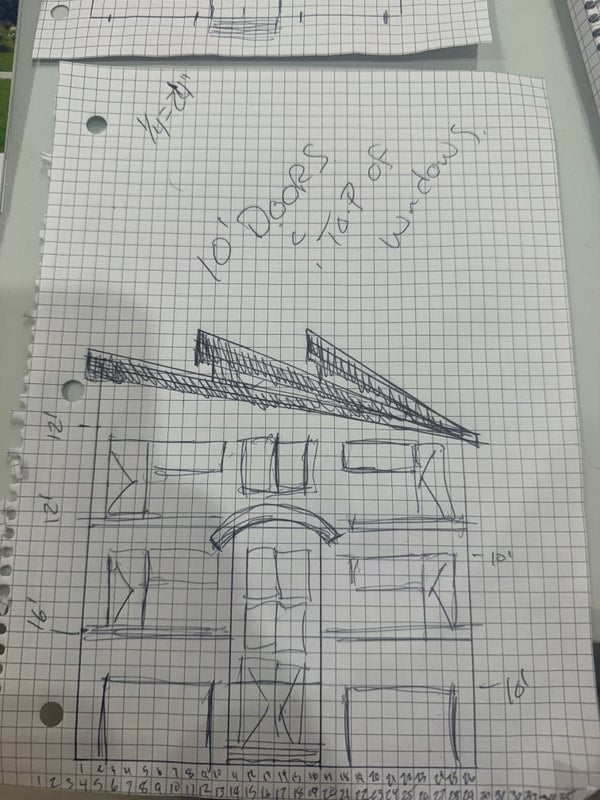
- Building intent — architectural sketch, elevation, material notes, or a civil site plan. More precision → better output.
- Scale reference — neighbor building height, typical lot width for the area, or dimensions from the architect.
- Photoshop (or Photopea) for rescaling, compositing, and finish work after EDIT generates. Photopea cannot replace EDIT’s GenAI; Photoshop’s generative tools help on the finish pass.
Optional: mark driveway, sidewalk, and setback lines before you prompt—EDIT follows visible guides more reliably than vague text.
Upload your aerial in EDIT
Open EDIT. Click + New and upload the clearest aerial you have—lot edges, street, and neighboring roofs readable.

Low-resolution Google Maps captures often fail on vegetation and fine detail. Upscale first, remaster the scene, or ask the client for the original drone / MLS still.
Use the EDIT Assistant
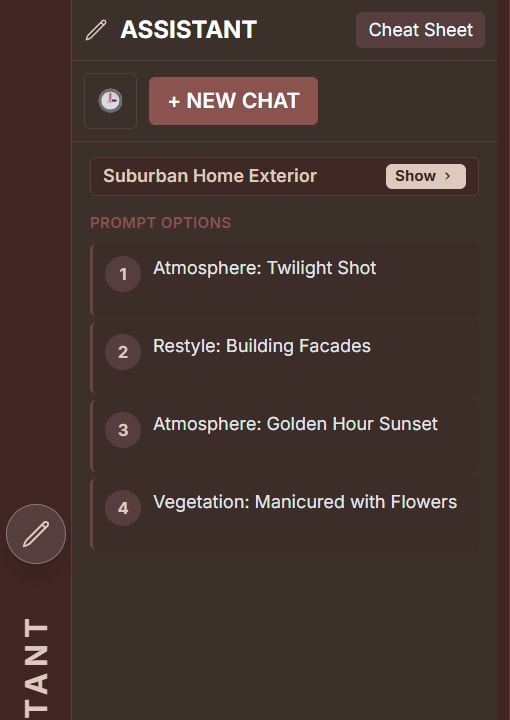
Open the Design Assistant in EDIT. You do not need a polished, copy-paste prompt here. Optionally attach an architectural sketch or elevation as a reference image, then describe what you want in plain language—place this building inside the lot boundary, match the neighbor’s scale, add coastal landscaping, and so on. The Assistant helps structure the request; when you attach a reference, that file is the source of truth for massing and materials.
The four-step workflow in EDIT
This is the core loop for placing a proposed building on a real aerial or satellite photo. Easy infill jobs may stay entirely in EDIT; tighter coastal lots and client revisions usually add Photoshop in steps 2–4.
Before step 1, gather:
- Your aerial uploaded in EDIT
- Lot boundary marked (Refine or a yellow guide on the image)
- Optional: architectural sketch or elevation attached as a reference in the Assistant
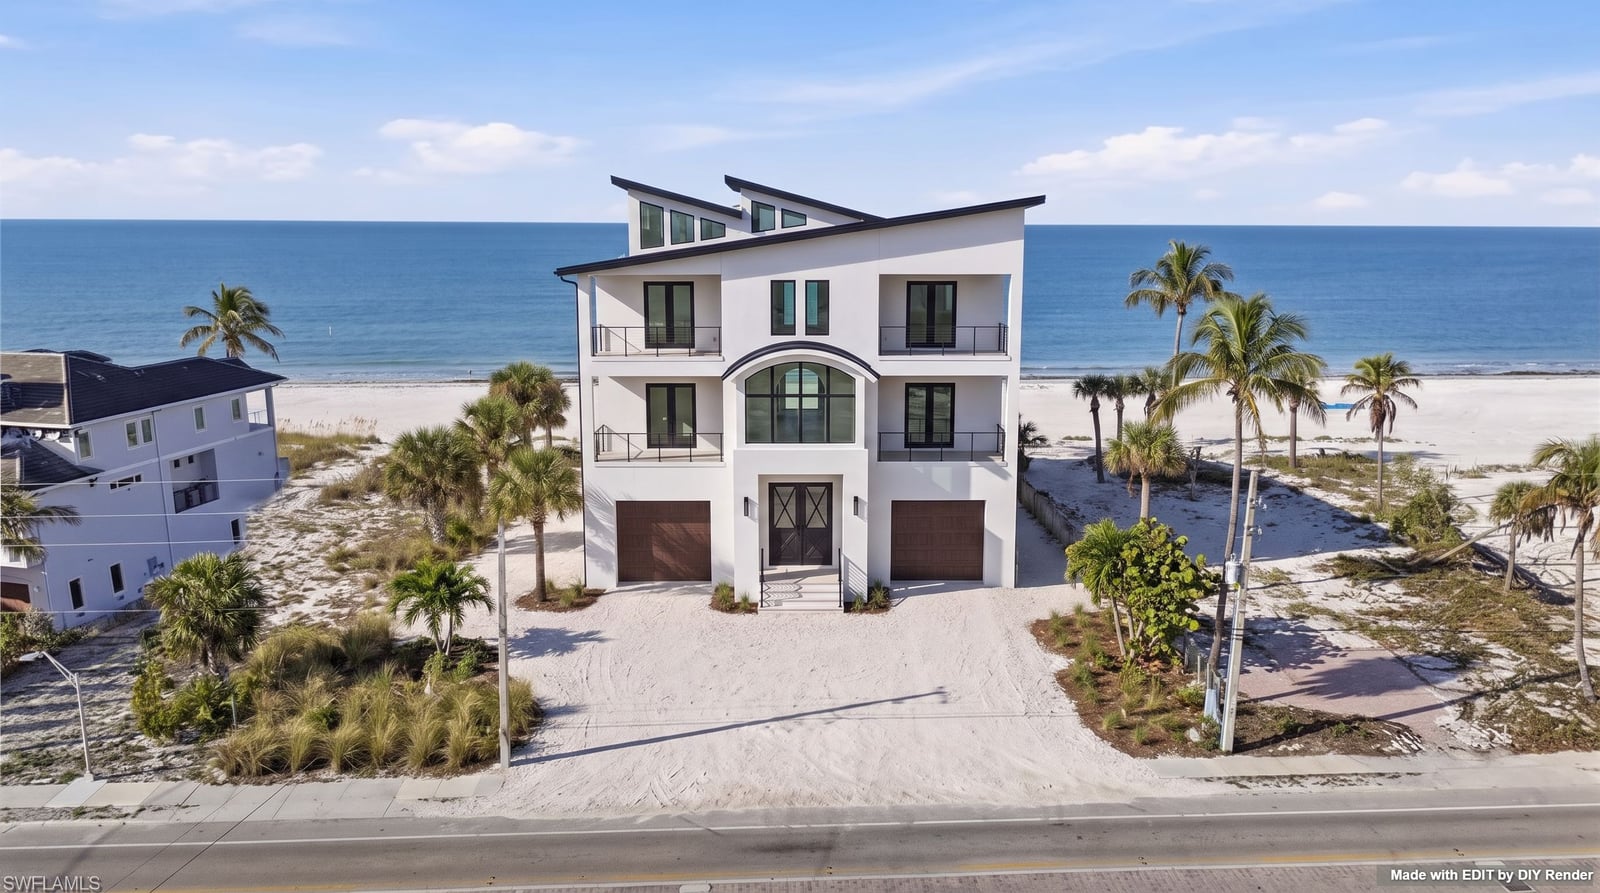
Step 1 — House on the lot
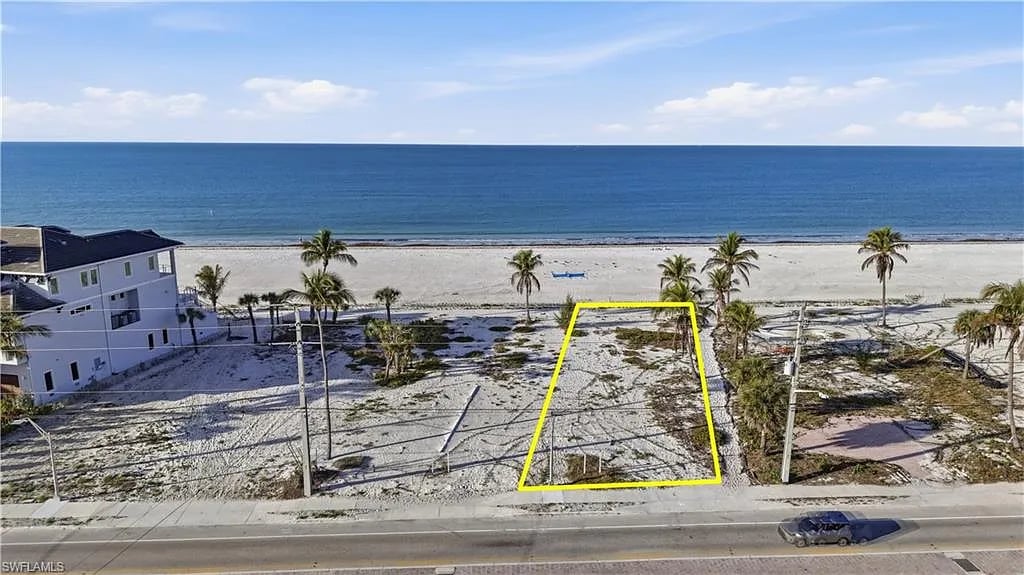
Generate the building inside your lot boundary on the aerial. If you attached a reference sketch or elevation, massing, roofline, and materials should follow it.
Prompt — place house in boundary
Place the proposed modern coastal home from the reference image inside the highlighted lot boundary on the vacant lot in the base image. Scale the structure to fit the lot width, matching the height of the nearest comparable building. Remove the boundary highlight completely. Add coastal landscaping, driveway, and walks that connect to the existing street. Preserve the surrounding ocean, beach, street, and lighting from the original aerial photo.Step 2 — Resize for the lot (Photoshop)
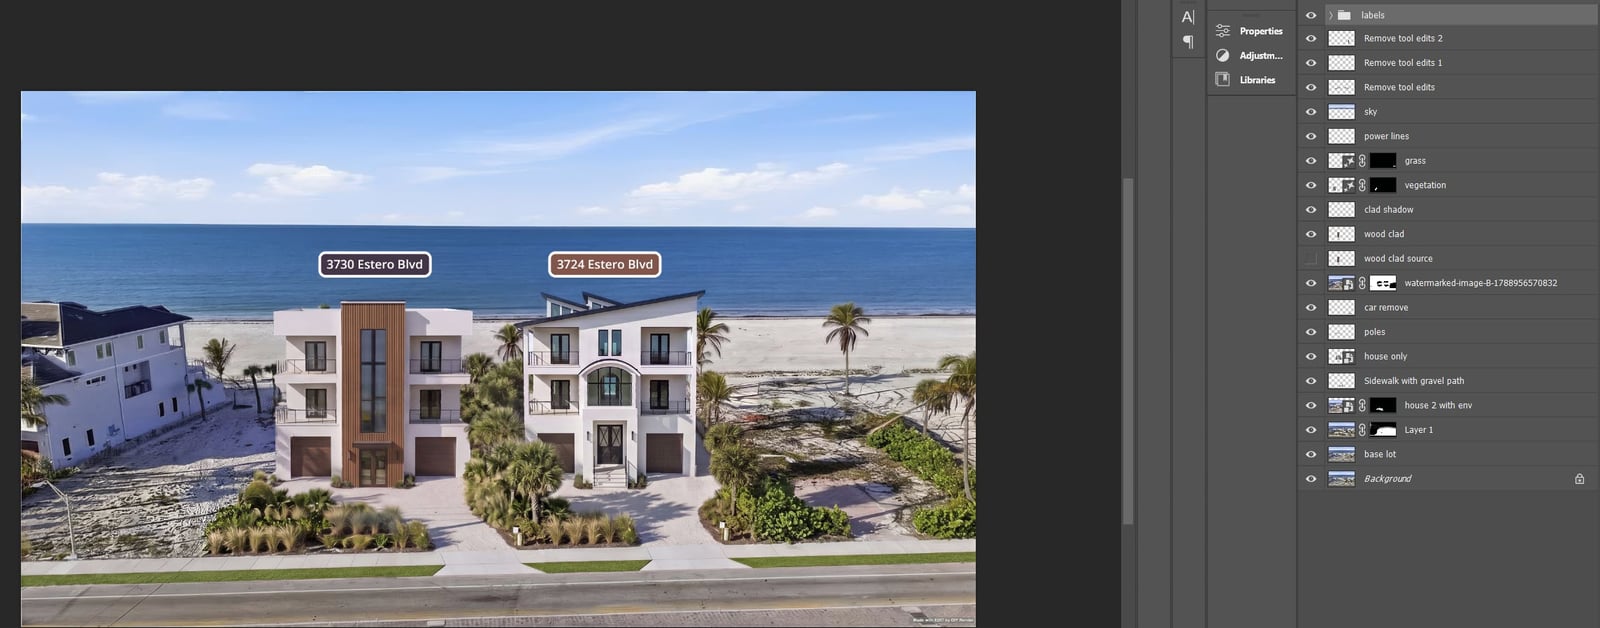
EDIT often makes the house too large. Isolate the building on its own layer, scale to the lot and neighbor, then bring it back into EDIT for landscaping and blending.

Check scale against:
- Lot width and setbacks
- Adjacent building height
- Architect dimensions or typical lot sizes for that market
Step 3 — Landscaping and cleanup (EDIT + Photoshop)

Run EDIT for planting, paving, and atmosphere. Use Photoshop for power lines, gates, labels, fences, and merging multiple EDIT versions (buildings from one pass, vegetation from another). Draw sidewalk and driveway guides when the model drifts.
Prompt — landscaping after resize
Add manicured coastal landscaping with palms, native shrubs, and sea oats along the lot perimeter, plus a clean poured-concrete sidewalk parallel to the road. Preserve the exact building geometry, ocean background, and bright daylight. Remove any boundary guide lines.Step 4 — Enhance, deliver, revise
When the comp is close, Enhance in EDIT (creative or precise). Finish light poles, labels, and color in Photoshop. Send to the client; expect revision rounds on camera, materials, and site elements.
Lot boundary — do not skip this
| Method | How | Best for |
|---|---|---|
| EDIT Refine | Mark the lot in Refine before you generate | Corner infill, suburban lots—no Photoshop needed |
| Manual guide | Yellow (or red) rectangle drawn on the buildable area in any markup tool | Beach lots, odd shapes, quick tests |
Without a boundary, placement and scale wander.
Project paths (easy → hard)
Easiest — civil site plan on aerial
Who: Engineering firms, consultants, developers, investors.
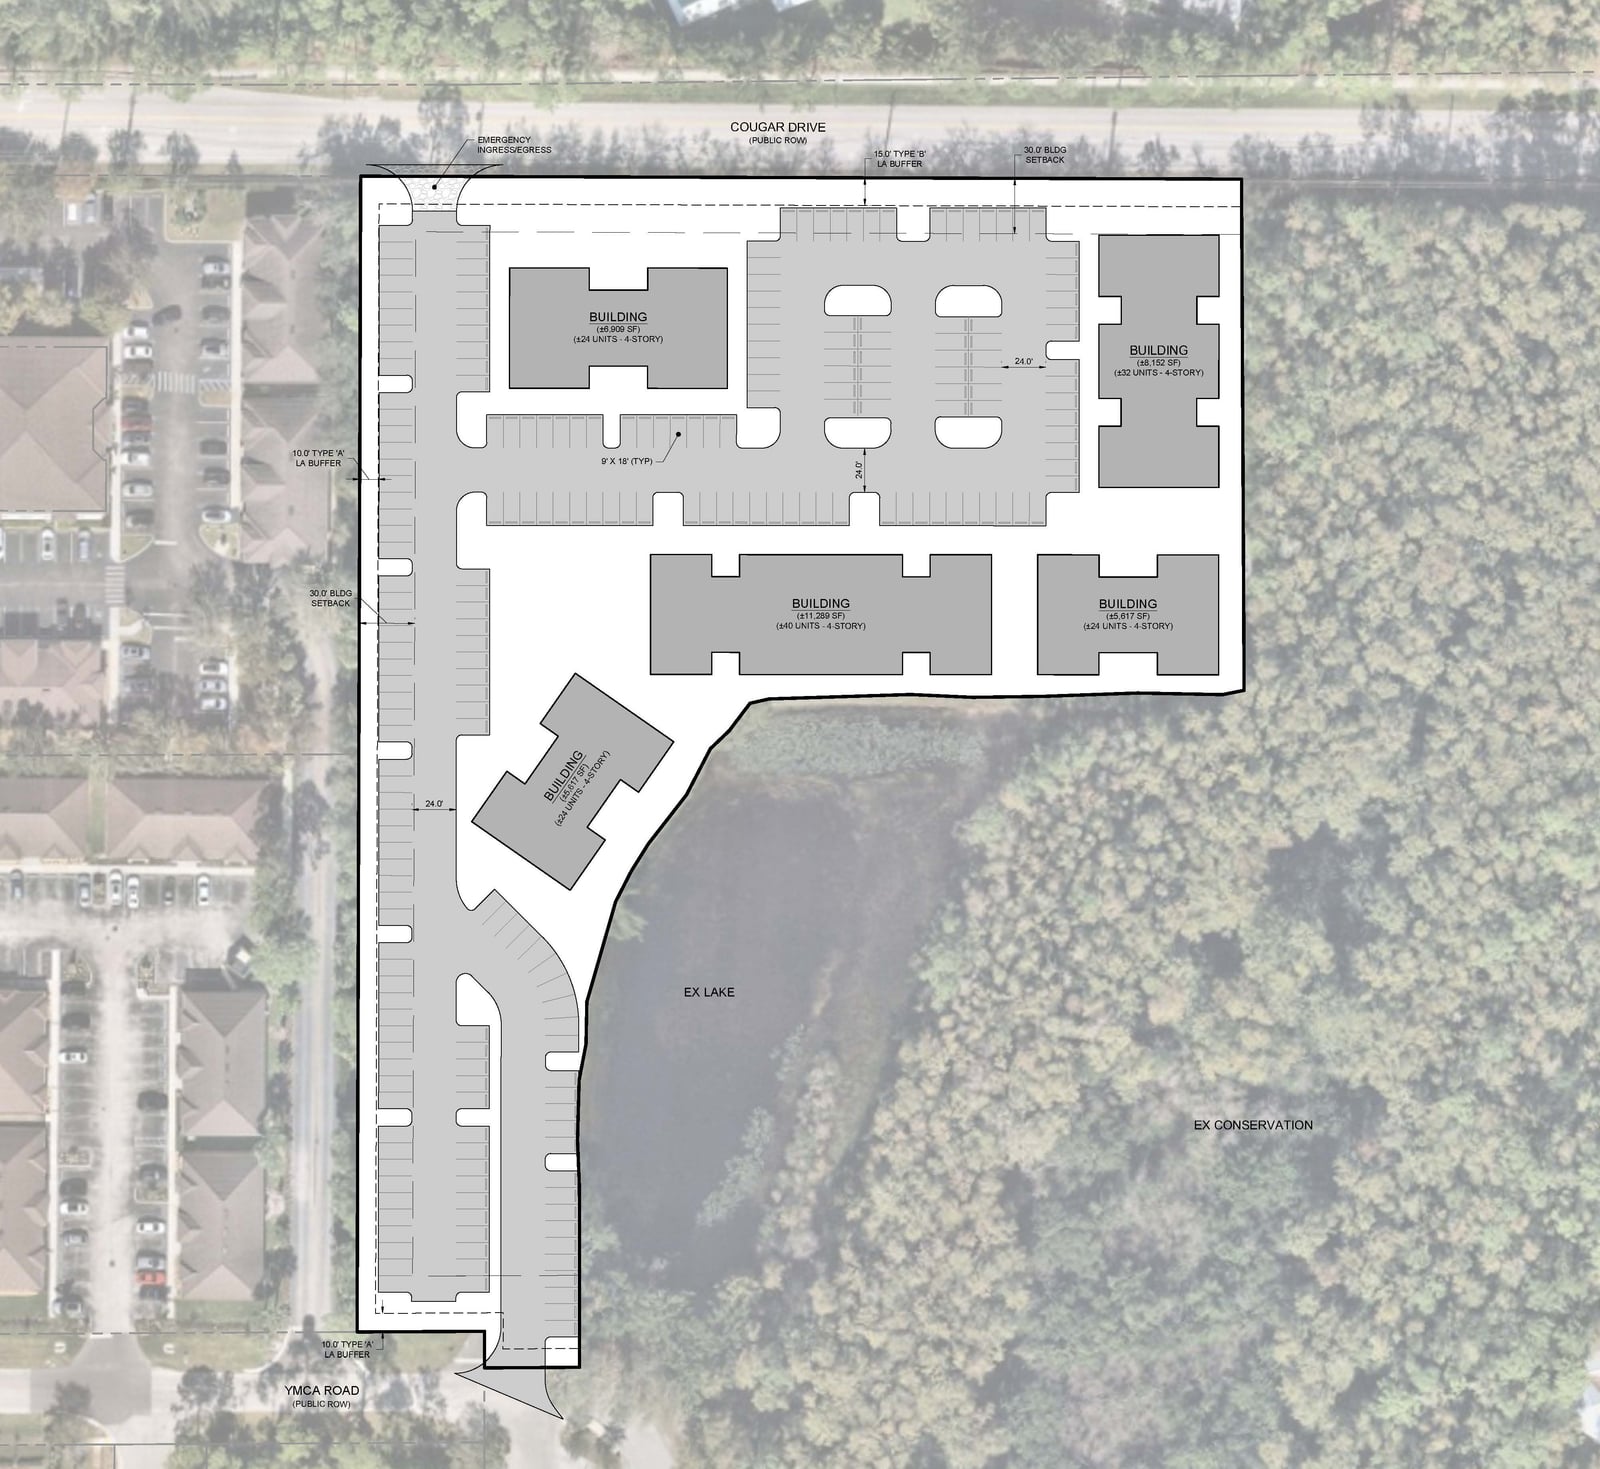
Input: Site plan overlay (footprints, parking, setbacks).
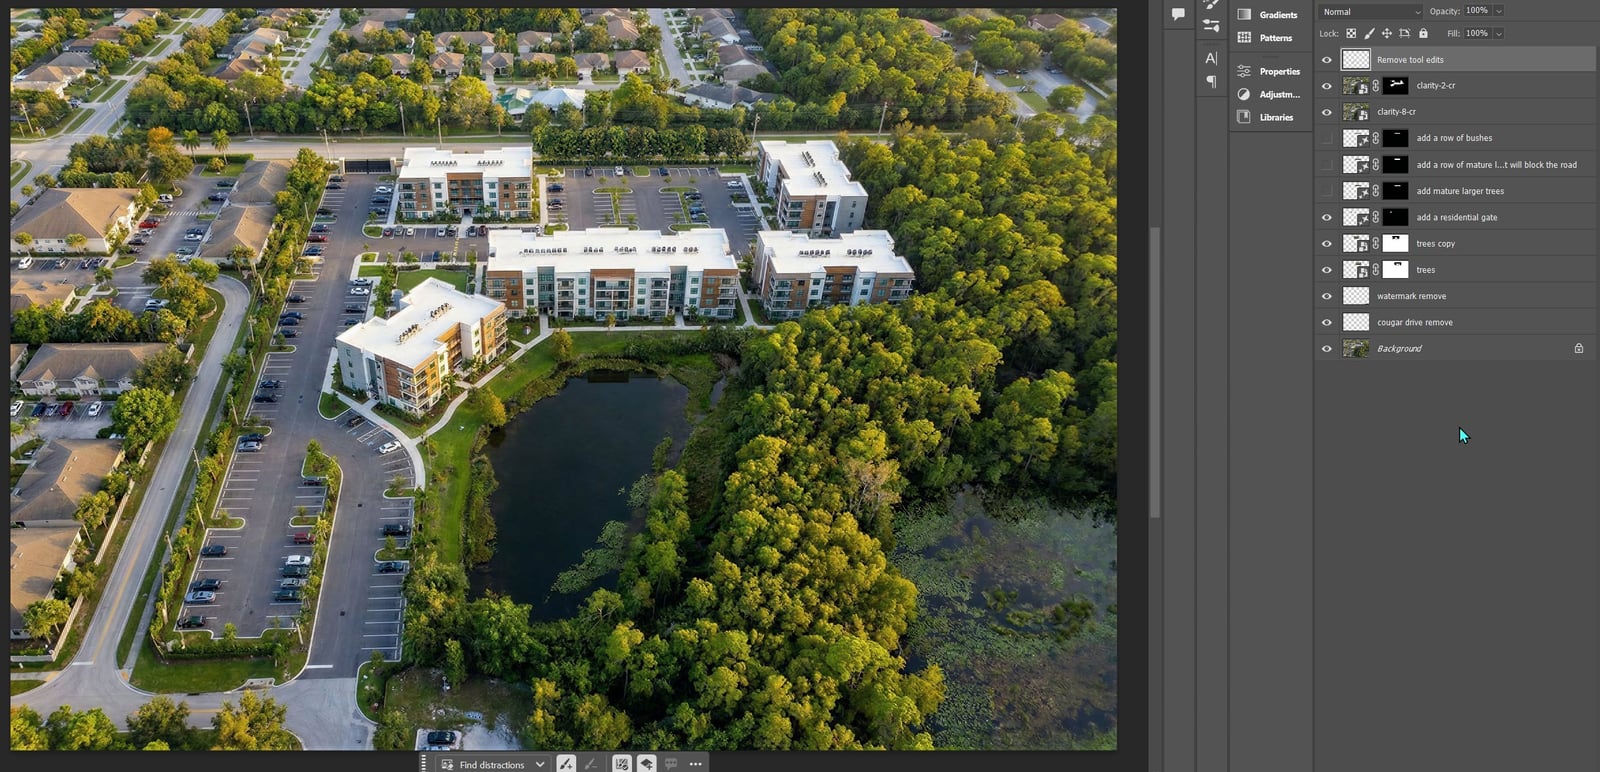
Workflow: Prompt from the plan → localized EDIT fixes → add a few details in Photoshop (we added a gate, tree buffers, and labels) → split upscale (buildings low creativity, landscape higher) → composite.
Prompt — site plan to aerial
Create an aerial rendering from this site map. View starts from where the red dot is located. Each building is four stories tall and should be modern multi-family complexes. Populate landscaped areas with mature regional vegetation dense on the property edges. Golden hour, partly cloudy sky, crisp shadows.Civil plans beat generic lot outlines. Generic boundaries without dimensions give the weakest results.

Easy — corner lot infill
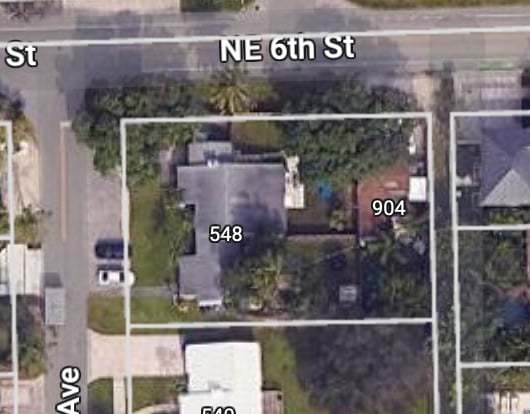
Input: Satellite or aerial with an existing structure.
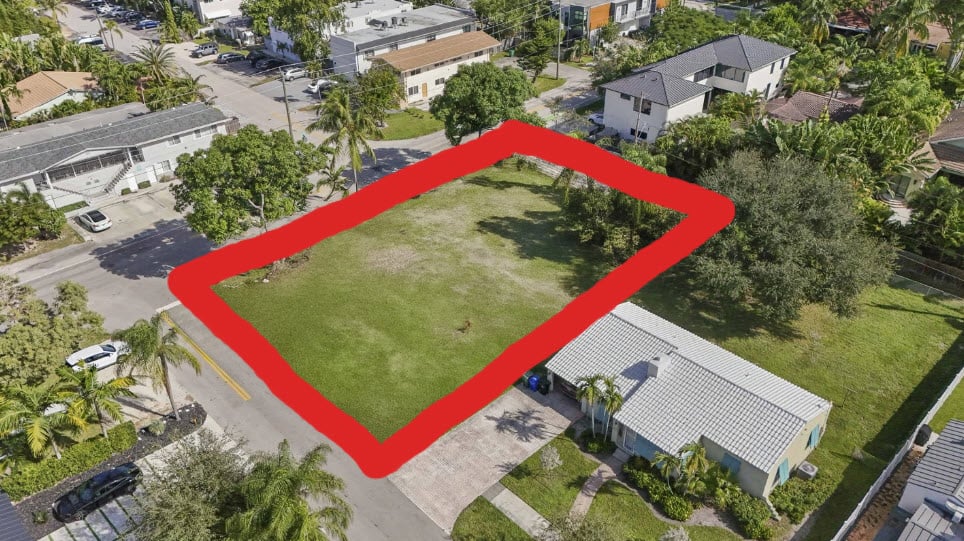
Workflow: Clear the lot to grass → Refine lot boundary in EDIT → add the new home → enhance.
Name the location in your prompt—city, region, or neighborhood—so roof styles, lot sizes, and landscaping feel local. A mountain-town infill reads differently than a Florida corner lot.
Prompt — build inside Refine boundary
An aerial, photorealistic rendering of a new modern luxury home on the empty, grass-covered lot outlined by the red line in the base image. Scale footprint and massing to the marked area, leaving logical space for landscaping, driveways, and walks to the street. Match lighting, shadows, color, and high-angle perspective of the original photo. Make no changes outside the outlined lot. Remove all red guide lines.Google Maps vegetation prompts have limited effect—remaster the base or use better source photography first.


Advanced — tight coastal lots
Input: MLS aerial, sketch, short material brief.
Workflow: Boundary guide → EDIT generate → isolate and resize in Photoshop → EDIT landscaping rounds → composite multiple EDIT versions → enhance → PS labels and cleanup.
This path wins projects but fails often on scale without Step 2. Match the neighbor; use architect dimensions when you have them.
Debordieu — concept vs 3D
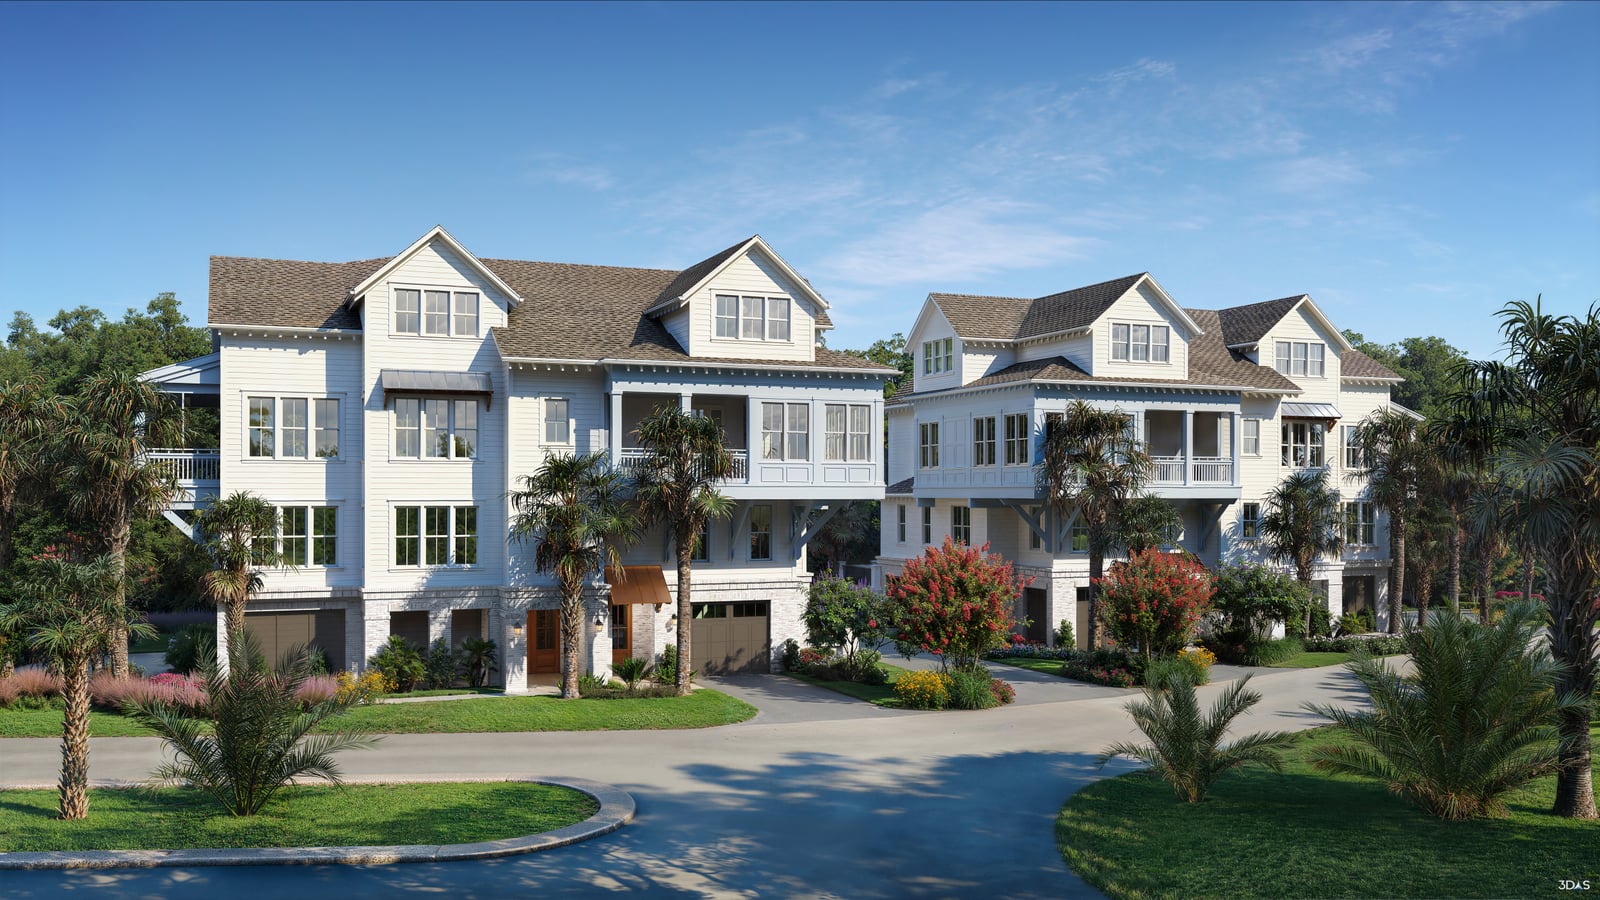
The Debordieu project started as a concept aerial made for marketing—get the idea across quickly before investing in full production renders. The EDIT concept validated placement and neighborhood scale; once the client bought in, production 3D aerials and elevations matched the architectural drawings for brochures and approvals.


Troubleshooting
| Problem | What to try |
|---|---|
| House too large | Isolate in Photoshop, resize, re-run EDIT for landscape |
| Wrong camera angle | Orbit prompt with a locked reference image |
| Vegetation will not stick | Upscale or remaster low-res map imagery; draw planting zones |
| Sidewalk / driveway misaligned | Draw guides on the base image |
| Low-res source | Upscale before you start, or get MLS / drone originals |
| Vague engineering (ramps, structure) | Get dimensions and layout from the engineer |
| Too much to handle? Not enough time? | Hire a professional—we specialize in this at 3DAS. |
Garbage in, garbage out
On a medical office campus project, the client wanted a helical (spiral) vehicular ramp but the brief was vague—a symbol on the plan, not a resolved design. EDIT produced dramatic spiral ramps that did not match site engineering. The labeled final aerial followed the civil plan; the bad ramp concepts were discarded. Better instructions beat more Photoshop.


Grids after the aerial is locked
Once the aerial deliverable is approved, a 3×3 presentation grid in EDIT can highlight a building or amenity already visible in that render—frontal, 45°, and top-down panels. Grids are not a substitute for engineering you never drew, and they must be based on the finished aerial—not generated in isolation.
Prompt — campus grid
Generate a 3x3 multi-panel architectural presentation grid of the corporate park complex. Row one: the medical building. Row two: the central fountain pond. Row three: the office building behind the fountain. Column one: frontal elevations. Column two: 45-degree perspectives. Column three: top-down aerials. Consistent daylight, materials, and landscaping across all nine panels with sharp definition and clean grid dividers.Open grids from the EDIT Assistant Cheat Sheet or Grids above the prompt bar (below), or ask the Assistant to create a 9-panel grid with what you want in each column or row:



Advanced path (when DIY is not enough)
- Composite multiple EDIT outputs in Photoshop (buildings from one, trees from another).
- Split Enhance / upscale passes—low creativity on architecture, higher on surroundings.
- Preserve site furniture in layers: sky, power lines, grass, sidewalks, neighbors.
- Finish labels, gates, and cleanup in Photoshop after upscale.
Some teams will stop here—that is fine. 3DAS handles concept aerials and production 3D under clear revision terms.
More guides
Same app—related jobs:
- 3D elevations — elevation drawing → photoreal exterior (step toward production 3D)
- Exterior Restyle, Light & Landscaping — polish an existing house photo
- 2D to 3D floor plans — plan view, not aerial
Browse every how-to with previews: All guides.
Test a building on a real lot before you commit to full 3D.
Try EDIT free — no credit card.